
How to Draw Braids Step by Step for Beginners
Learning how to draw braids step by step helps you improve your hair-drawing skills. Many beginners think braids look hard to draw.
In reality, a braid follows a simple repeating pattern. Once you understand this pattern, drawing braids becomes much easier.
In this tutorial, you will learn how to draw braids step by step using a clear and simple method. First, you will understand the basic braid shape.
Then you will follow easy steps to build the braid from top to bottom. Each step shows how the strands cross over each other.
By the end of this article, you will know how to draw beautiful braids for your drawings. So grab your pencil and follow the step-by-step tutorial below.
Note: Some links in this article are affiliate links.
Tools You Need to Draw Braids
Before you start learning how to draw braids, prepare a few basic drawing tools. You do not need expensive supplies.
Here are some simple tools to help you focus on the braid structure and practice the pattern easily:
• Pencil: Use an HB or 2B pencil to sketch the braid shapes with light lines.
• Eraser: Use a soft eraser to remove guidelines and fix small mistakes.
• Drawing paper or sketchbook: Smooth paper helps you draw clean braid shapes.
• Fine liner or ink pen: Trace the final braid lines to make the drawing look clear and defined.
• Colored pencils or markers(optional): Add color and light shading to give the braid more depth.
Once your tools are ready, the next step explains the basic structure of braids. Understanding this pattern will make drawing braids easier.
Related blog post: How to Draw Hair Step by Step?
Understanding the Structure of Braids
Before you start the braid drawing steps, you need to understand the basic braid structure. A braid follows a repeating pattern where hair sections cross over each other.
Once you understand this pattern, drawing braids becomes much easier.
Many beginners struggle with braids because they try to draw random hair strands. Instead, focus on the simple repeating shapes that form the braid.
The Basic Braid Pattern
A braid forms when three sections of hair cross over each other in a repeated pattern. Each section overlaps the previous one as the braid moves downward.
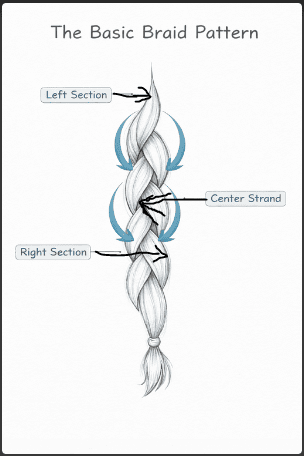
When you look closely, braid sections often look like repeated leaf shapes or teardrop shapes. These shapes alternate from left to right along the center of the braid.
As you draw, one strand crosses over the center, then the opposite strand crosses over next. This repeating crossing pattern creates the braided structure.
Why Braids Look Three-Dimensional?
Braids look three-dimensional because the strands overlap each other. Each braid section sits slightly above the section below it.
This overlap creates small shadows where the strands meet. When you add light shading under each overlapping section, the braid looks more realistic and full.
More reading: How to Draw a Face Step by Step?
How to Draw Braids? Step By Step Tutorial
Now you can follow our simple method to learn how to draw braids step by step. Each step builds on the previous one.
Therefore, work slowly and keep your lines light while sketching. This approach helps you fix mistakes easily and improve the braid shape.
Step 1. Draw the Center Guideline
First, draw a light vertical line in the middle of your paper. This line acts as the center guideline for the braid.
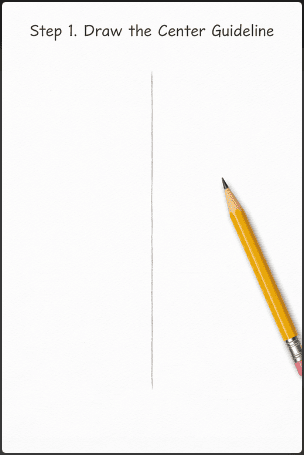
The guideline helps keep the braid straight and balanced from top to bottom. Without this guide, beginners often draw braids that lean to one side. Keep the line light so you erase it later.
Step 2. Draw the First Braid Section
Next, draw the first curved shape on one side of the guideline. Start near the top and draw a rounded leaf shape that points toward the center line.
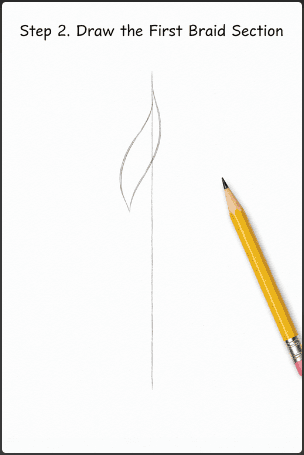
This shape represents the first section of hair crossing into the braid. Keep the curve smooth and slightly wide so the braid looks natural.
Step 3. Draw the Second Crossing Section
Now draw the second curved shape on the opposite side. This shape should cross toward the center and overlap the first section.
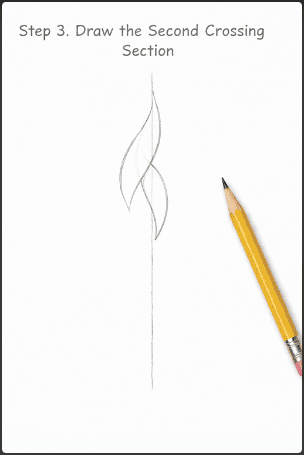
At this point, you start to see the braid pattern. Each new section crosses toward the center of the braid. The alternating direction creates the braided look.
Step 4. Repeat the Pattern Downward
Continue repeating the same pattern as you move downward. Draw one curved section from the left, then draw the next section from the right.
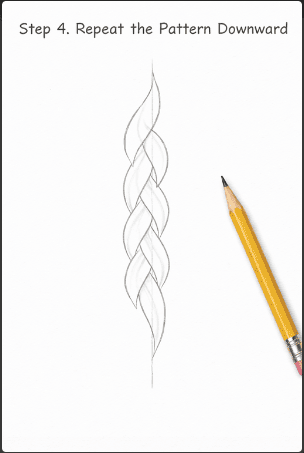
Try to keep each braid section similar in size. Consistent shapes help the braid look clean and balanced. As you repeat the pattern, the braid structure becomes clear.
Related blog post: 15 Easy Doodle Drawing Ideas for Beginners.
Step 5. Add the End of the Braid
When you reach the bottom, draw a small band to show where the braid ties together. Then draw a short section of loose hair below the band.

This step completes the braid shape and makes the drawing look more natural.
Step 6. Add Hair Strands and Texture
Next, add a few thin lines inside each braid section. These lines represent individual hair strands.
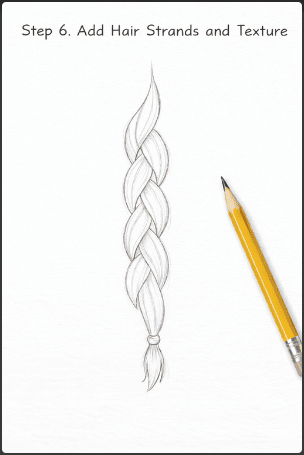
Draw the lines in the same direction as the braid curves. Do not add too many lines. A few light strokes create a cleaner look.
Step 7. Add Shading for Depth
Finally, add light shading under each overlapping braid section. This shading shows where one strand sits above another.
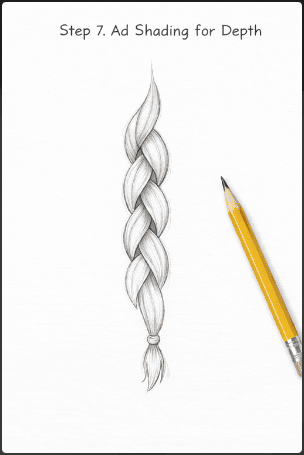
Use soft pencil strokes and blend the shading lightly. As a result, the braid gains depth and starts to look more three-dimensional.
Common Mistakes When Drawing Braids
Many beginners struggle when they first learn how to draw braids. Small mistakes often make the braid look flat or uneven. When you understand these common issues, you improve your braid drawings much faster.
Below are three mistakes beginners often make when drawing braids and how to fix them:
Drawing Strands Too Flat
A common mistake occurs when the braid sections sit next to each other without overlap. This makes the braid look flat and unrealistic.
In a real braid, each hair section crosses over another section. This overlap creates depth and gives the braid a layered look.
When you draw each section, make sure one strand slightly overlaps the one below it. Then add light shading under the overlapping area to show depth.
Making Braid Sections Different Sizes
Another mistake happens when the braid sections change size as you draw downward. Some sections become wide while others become narrow.
This breaks the braid pattern and makes the drawing look messy. Instead, try to keep each braid section similar in size and spacing. When you repeat the same leaf shape evenly, the braid looks clean and balanced.
Forgetting the Hair Flow
Hair always follows a natural direction. Beginners often draw random lines that do not follow the braid shape.
Instead, draw hair texture lines that follow the curve of each braid section. These lines should flow in the same direction as the hair strands. This small detail helps the braid look softer and more natural.
Easy Tips to Make Braids Look More Realistic
Small details make a big difference when drawing braids. Once you understand the braid structure, a few simple techniques help improve the final result.
• Use curved lines: Curved shapes make the braid look natural and soft.
• Keep sections consistent: Similar braid sizes create a clean and balanced pattern.
• Add light shading: Shade under overlapping sections to create depth.
• Draw a few loose strands: Small stray hairs make the braid look more natural.
• Practice larger braids first: Bigger shapes help you understand the braid pattern before drawing smaller braids.
Conclusion
Now you know how to draw braids step by step using a simple and clear pattern. First, draw a center guideline to keep the braid straight.
Then draw alternating curved sections that cross over the center. Finally, add hair texture and light shading to give the braid depth and shape.
With regular practice, drawing braids becomes much easier. You can start by drawing several braids on one page. As a result, your hand control improves, and the braid pattern becomes more natural.
With some practice, you will draw braids quickly and incorporate them into portraits, character drawings, or hairstyle sketches.
More blog posts:


Frequently Asked Questions
Here are some FAQs about drawing braids:
How do you draw braids step by step for beginners?
First, draw a light center guideline. Next, draw a curved leaf shape from one side toward the center. Then draw another curved shape from the opposite side. Continue repeating this pattern downward. Finally, add hair strands and light shading to complete the braid.
What is the easiest way to learn how to draw braids?
The easiest method starts with simple shapes. Many artists draw braids using repeated leaf or teardrop shapes. When you repeat these shapes evenly along a center line, the braid structure becomes clear and easier to draw.
Why do my braid drawings look flat?
Braid drawings look flat when the sections do not overlap. In a real braid, each strand crosses over the previous one. Therefore, you should draw each section slightly overlapping the next and add soft shading under the overlap.
What shapes help when learning how to draw hair braids?
Most beginners use leaf shapes or teardrop shapes to build the braid pattern. These shapes alternate from left to right along the center of the braid. As a result, the braid looks balanced and consistent.
How do you make a braid drawing look more realistic?
First, keep the braid sections similar in size. Next, add curved hair texture lines that follow the direction of the strands. Finally, apply light shading under the overlapping sections so the braid looks more three-dimensional.