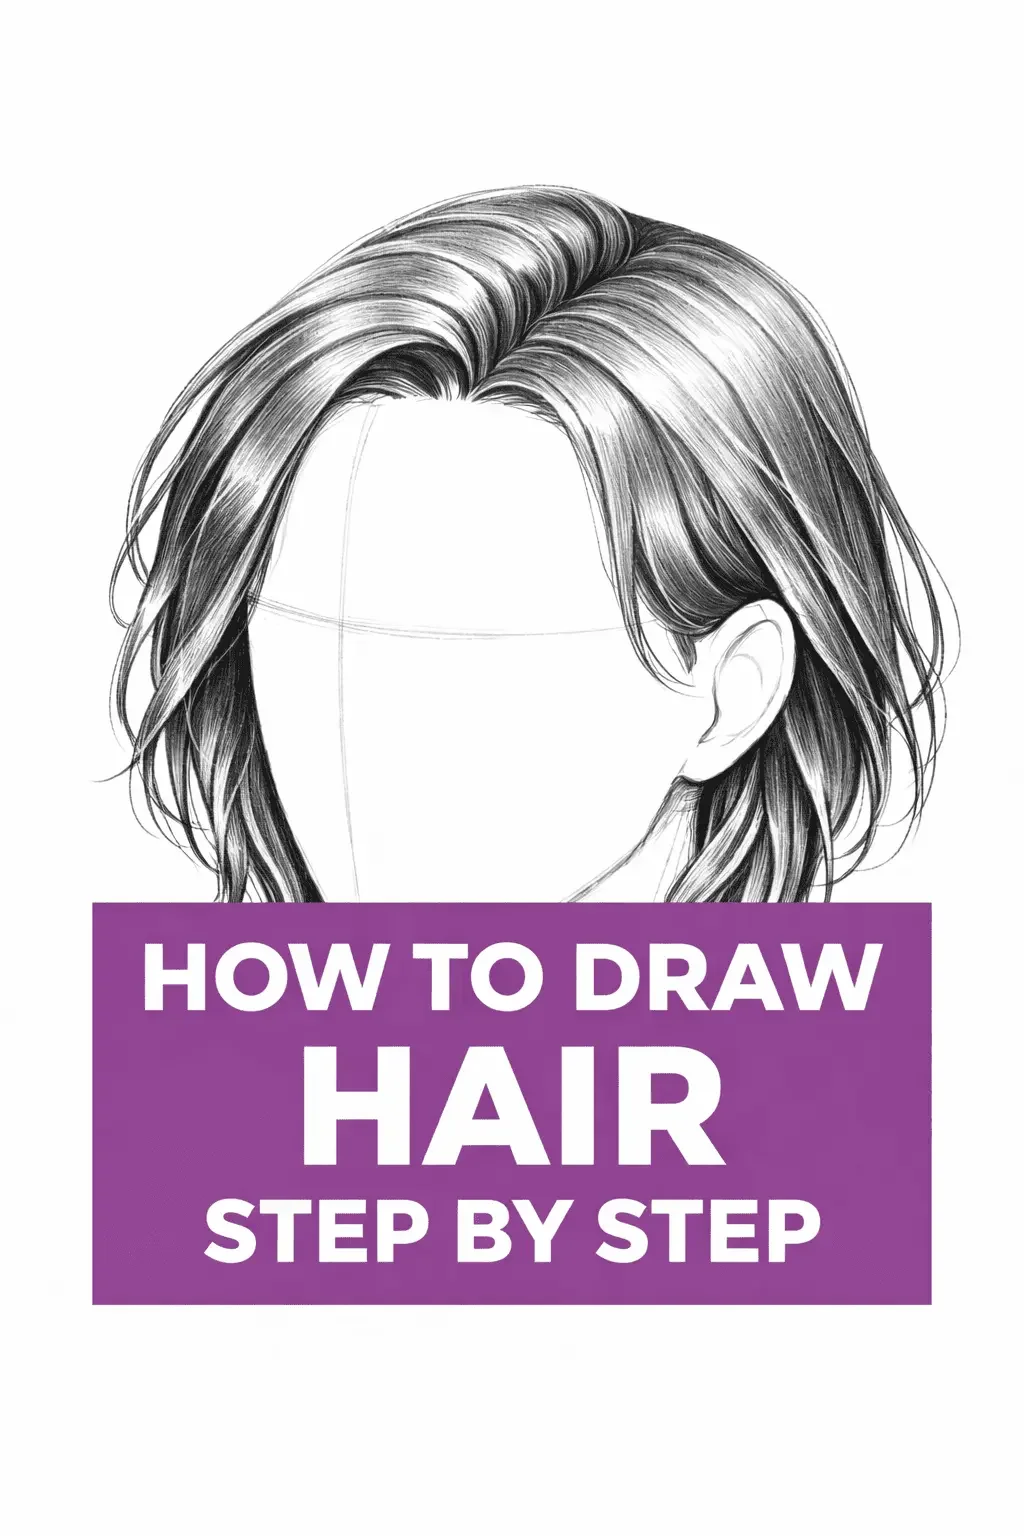
How to Draw Hair Step by Step: Tutorial for Beginners
If you’re looking for how to draw hair step by step, you’re in the right place. This is one of the most searched drawing questions, and for good reason.
Hair often ruins an otherwise good portrait. You finish the eyes, nose, and lips. But then the hair looks messy. The problem is not your talent. The problem is your process.
Most beginners try to draw every strand from the start. That approach leads to frustration and weak results. Hair works in shapes, sections, light, and shadow. When you understand this structure, your drawings improve fast.
In this article, you will learn how to draw hair step by step using a clear method you can apply right away. You will focus on volume first, then flow, then shading, and finally texture.
Follow these steps, practice with intention, and your hair drawings will start to look natural. So let’s get started.
Tools and Basics You Should Know
Before you start, set yourself up with the right tools and a clear understanding of structure.
Basic tools for pencil drawing:
HB pencil for sketching.
2B to 6B pencils for shading.
Kneaded eraser for highlights.
Blending stump or tissue for soft transitions.
Smooth drawing paper for clean strokes.
If you draw digitally, use:
A hard round brush for sketching.
A soft brush for shading.
A pressure-sensitive pen for line variation.
Now focus on structure. Hair does not grow randomly. It starts from the scalp and flows outward in sections. You should always draw the skull first. Hair sits on top of the head, so if the head shape is wrong, the hair will look wrong.
Also, remember this rule. Draw hair in clumps, not individual strands. You will add strands later for detail. Start with big shapes, then medium shapes, then small details.
Light source matters. Decide where your light comes from before you shade. This will control where your highlights and shadows go.
Related blog post: How to Draw Roses Step by Step?
How to Draw Hair Step by Step
Here is how you can draw hair step by step. You can follow the steps below:
Step 1: Draw the Head and Hairline
Start by lightly sketching the basic head shape. Do not rush this stage. Even though you want to get to the hair, this step sets the foundation for everything.
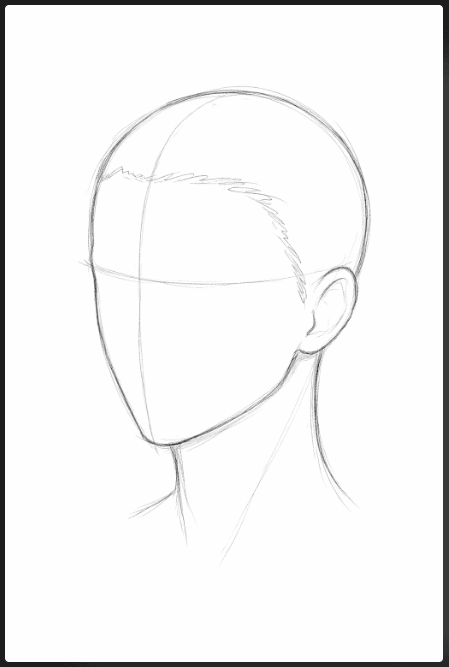
Focus on proportions. Make sure the top of the skull has enough height. Many beginners draw the head too flat at the top, which leaves no room for volume.
Next, mark the hairline. Avoid drawing a hard, sharp border. Real hairlines have irregular edges. They move slightly up and down instead of forming a perfect curve.
Keep your strokes light because you may adjust them later. At this point, you are building structure, not detail.
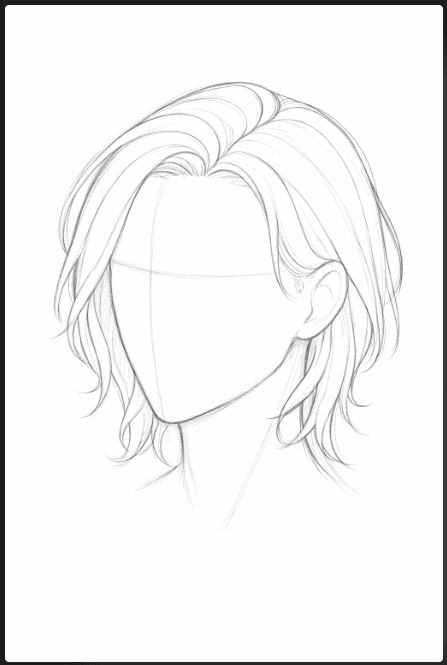
Step 2: Block in the Main Hair Shape
Now move to the outer shape of the hair. Think of it as one big silhouette. Is the hairstyle long and flowing? Is it short and tight to the head? Does it flare outward?

Draw that overall shape clearly. Keep your lines confident but light. Do not draw strands yet. Instead, focus on volume.
Ask yourself where the hair lifts away from the scalp. For example, hair often rises slightly at the crown before falling. That lift creates dimension. If you skip this thinking process, the hair will look pasted onto the head.
Step 3: Divide the Hair Into Sections
Once you have the large shape, break it into medium-sized sections. This is where the drawing starts to feel realistic. Hair naturally groups into clumps.
Even straight hair forms subtle sections. So draw flowing lines that divide the hair into layered parts.
Make sure these sections follow the direction of growth. For straight hair, use long downward curves. For wavy hair, create repeating S shapes.
For curly hair, group curls into clusters instead of outlining each spiral individually. By organizing the hair into sections, you create structure and movement at the same time.
Step 4: Add Basic Shading
Now choose your light source clearly. Suppose the light comes from the left side. That means the right side and the underside of hair sections will be darker.
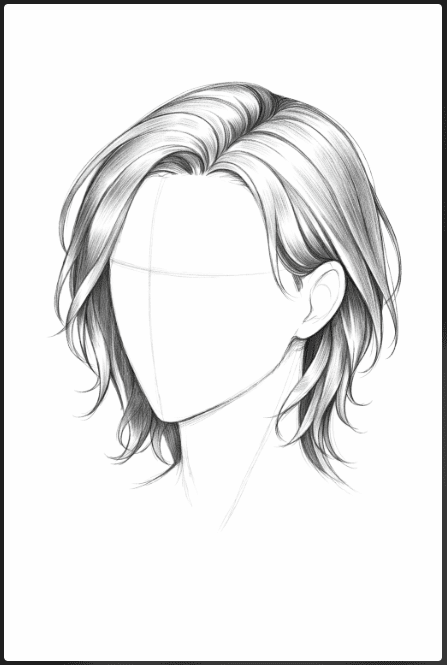
Start by shading the shadow areas first. Focus on areas under overlapping clumps and near the roots.
Use smooth strokes that follow the direction of the hair. This keeps the shading natural. Avoid random back-and-forth motion. Leave highlight areas untouched.
Hair shine usually appears as elongated shapes that follow the curve of the hair. By keeping those areas lighter, you create the illusion of gloss and depth.
Step 5: Add Texture and Select Strands
After you establish solid light and shadow, begin adding texture. This step requires control. Use longer strokes for long hair and shorter strokes for short styles. Always follow the flow direction you established earlier.
Do not cover the entire drawing with thin lines. Instead, add strands strategically in darker areas and along edges. This suggests detail without overwhelming the drawing.
Use lighter pressure in highlight areas and stronger pressure in shadow areas. That variation makes the hair feel layered and natural.
Step 6: Increase Contrast and Refine
Now step back and evaluate your drawing. Does it look flat? If yes, your contrast is likely too weak. Deepen your darkest shadows carefully. Add darker tones between clumps to separate them clearly.
Then refine highlights. Use your kneaded eraser to lift thin lines in the direction of the hair. This creates shine.
You can also sharpen certain edges to make the form clearer. Check your drawing from a distance. Strong value contrast should be visible even when you squint.
How to Draw Different Hair Types Step by Step
Here is how you can draw some hairstyles step by step:
Straight Hair
Straight hair relies heavily on smooth flow and consistent direction. Begin with long sections that move in a unified direction. Avoid zigzag lines because straight hair usually falls smoothly.
When shading, create long highlight bands that run parallel to the strands. These highlights often appear near the center of large sections.
Keep shadows soft but defined along the edges and underneath overlapping layers. The key here is control and smoothness.
Curly Hair
Curly hair requires you to think in three-dimensional forms. Start with the overall volume first. Curly hair often expands outward, so allow enough space for that shape.
Next, draw the path of major curls. Do not outline every small curl at once. Instead, suggest clusters. Shade inside each curl, especially on the inner curve, because light rarely reaches those areas.
Leave the outer curve lighter to show roundness. This contrast gives curls depth and bounce.
Wavy Hair
Wavy hair sits between straight and curly. Use repeating S curves to create rhythm. Make sure each wave flows naturally into the next one.
Shade the underside of each wave slightly darker. The top of each wave catches more light. By alternating light and shadow across the waves, you build movement. Keep transitions soft to avoid harsh breaks.
Short Hair
Short hair focuses more on direction and density than length. Begin by mapping the direction of growth. Hair may point forward, backward, or slightly outward depending on style.
Use short, controlled strokes. Darken areas near the roots because they receive less light. Leave the tips lighter if they receive direct light. Short hair often shows stronger contrast because the layers are tighter and closer together.
Related blog post: How to Draw Eyes Step by Step?
Common Mistakes When Drawing Hair
One common mistake is drawing strand by strand from the beginning. This removes structure, making the drawing look messy. Instead, build large shapes first.
Another mistake is ignoring the skull. If the hair does not wrap naturally around the head, the portrait looks unnatural. Always check the underlying form.
Flat shading is also a frequent problem. If your values are too similar, the hair will lack depth. Increase the difference between your lightest and darkest areas.
Finally, avoid overblending. When you blend too much, the texture disappears, and the hair looks smooth like plastic. Preserve directional strokes to maintain realism.
FAQs About How to Draw Hair Step by Step
Here are some frequently asked questions about drawing hair:
Why does my drawn hair look flat?
Most likely, your contrast is too weak, or you skipped grouping the hair into sections. Strengthen shadows and clearly define clumps.
How do you draw realistic highlights?
Plan your highlights before shading. Leave those areas lighter from the beginning, then refine them with an eraser following the direction of the hair.
Should beginners draw every strand?
No. Focus on shapes, volume, and values first. Add individual strands only after the structure looks solid.
Is pencil or digital better for beginners?
A pencil helps you understand value control and pressure. Digital tools give flexibility and easy corrections. Choose one and practice consistently so your skills improve faster.
Conclusion
Now you know how to draw hair step by step using a simple, structured method. Focus on large shapes first, then sections, then shading, and add strands last. Keep your light source consistent and push your contrast so the hair looks three-dimensional.
Practice one hairstyle at a time and repeat the same process. With steady practice and attention to structure, your hair drawings will improve quickly.
More blog posts: