
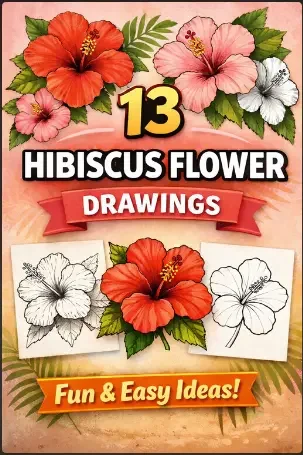
13 Hibiscus Flower Drawings You Can Easily Recreate
Hibiscus flower drawings are one of the easiest ways to start sketching flowers, especially if you want quick and clean results.
The shape is simple, the petals are bold, and the structure is easy to follow. As a result, you can improve your drawing skills without feeling overwhelmed.
If you are searching for easy flower drawing ideas, hibiscus designs work well for beginners and intermediate artists. You can start with a basic outline, then move to more detailed styles with shading, color, or patterns.
In this article, you will find 13 hibiscus flower drawings you can recreate step by step. Each idea focuses on a different style. This will help you practice new techniques. So let’s get started.
Note: Some links in this article are affiliate links. We might get a small commission at no cost to you if you buy something from our link.
Supplies You Need to Draw a Hibiscus Flower
Before you start drawing, you need a few basic tools. You do not need expensive materials. Simple supplies work well, especially if you are a beginner.
The goal is to keep your setup easy, so you focus on practicing the flower shape and details.
You can start with these supplies:
Pencil (HB or 2B): Use an HB pencil for light sketches and a 2B pencil for darker lines and shading.
Eraser: A soft eraser helps you clean up guidelines and fix mistakes without damaging the paper.
Paper or sketchbook: Choose smooth paper so your lines look clean and controlled.
Black pen or fineliner: Use this to outline your drawing and make it look more polished.
Colored pencils: Great for beginners who want control and soft color blending.
Markers: Useful for bold colors and smooth fills, especially for vibrant hibiscus styles.
Watercolors(optional): Good for soft, blended effects if you prefer a more artistic look.
Digital tablet(optional): If you draw digitally, use a tablet with an app like Procreate to sketch, outline, and color in layers.
Keep your setup simple and consistent. Once you have these supplies ready, you can start practicing without distractions and improve faster.
Related blog post: 15 Easy Flower Drawings for Beginners.
How to Draw a Hibiscus Flower Step by Step
Drawing a hibiscus flower becomes much easier when you follow a clear order. Focus on simple shapes first, then build details gradually.
Keep your lines light in the beginning so you can adjust as you go.
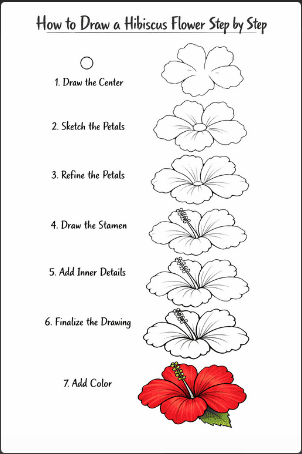
Here are some steps to follow:
Start with the center: Draw a small circle in the middle of your page. This marks the center of the flower and helps you place everything correctly.
Sketch the basic petal layout: Draw five large petals around the circle. Use soft, curved lines. Do not worry about perfection. Hibiscus petals are slightly uneven and natural.
Shape each petal: Go back and refine each petal. Add gentle waves or slight folds along the edges. Let some petals overlap a little to make the flower look more realistic.
Draw the stamen: From the center, draw a long, thin tube coming out. At the tip, add small round shapes to show the pollen. This is a key feature of hibiscus flowers.
Add inner details: Draw light lines inside each petal starting from the center and moving outward. These lines represent the natural veins of the flower.
Clean up your sketch: Erase extra lines and redraw your final outline with more confidence. Keep your lines smooth and clear.
Add shading or color: Darken areas where petals overlap. Keep the outer parts lighter. If you color, use soft blends of red, pink, yellow, or orange to give the flower a smooth, natural look.
13 Hibiscus Flower Drawings
Hibiscus flowers give you a simple structure and strong shapes, which help you improve faster.
Each idea below focuses on a single approach so that you can build flower drawing skills step by step. Follow the tips, practice each style, and repeat the ones you enjoy most.
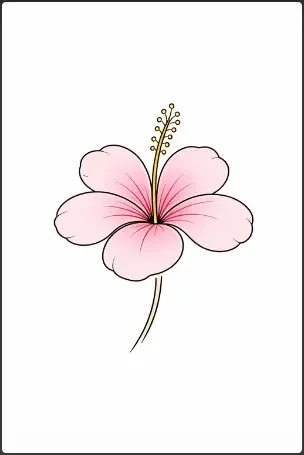
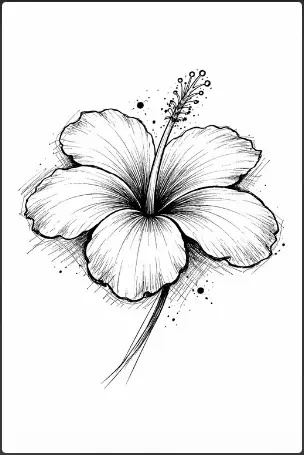
1. Simple Hibiscus Outline Drawing
A simple hibiscus outline drawing focuses on the basic shape of the flower without any extra detail. This style helps you understand the structure and build confidence before moving to more complex designs.
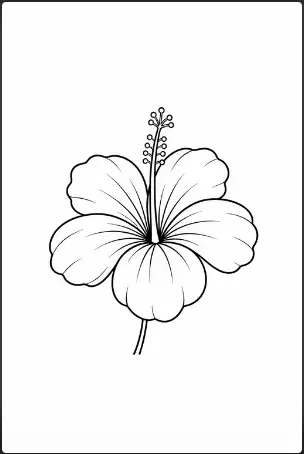
You need to start with a light sketch of five petals. Keep the shapes wide and slightly curved.
Then draw a long center line for the stamen and add small circles at the tip. Focus on proportion and spacing between petals so the flower looks balanced.
After you complete the sketch, trace over your lines with a pen or a darker pencil. Keep your lines smooth and consistent.
This exercise trains your hand control and helps you understand the base structure before adding details.
2. Easy Hibiscus Flower Drawing Step by Step
This drawing idea breaks the hibiscus flower into simple steps. It works well if you prefer a clear process and want to avoid confusion while drawing.
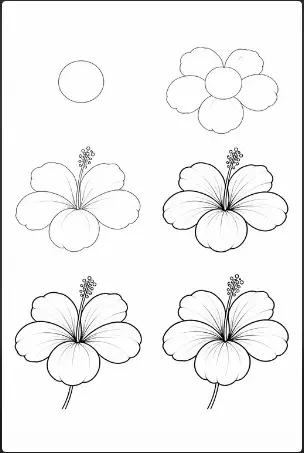
You should start with a small circle in the center. From there, sketch each petal one by one, using the circle as your guide. Keep your strokes light so you can adjust the shape as you go.
Next, add the stamen and refine the edges of each petal. Clean up unnecessary lines and define the final shape.
This step-by-step method helps you avoid mistakes and gives you a clear process you can repeat for other flowers.
3. Minimalist Hibiscus Line Art
Minimalist hibiscus line art uses clean lines and avoids heavy detail. This style is popular for aesthetic designs, tattoos, and simple illustrations.
Use a single continuous line or clean strokes to draw the flower. Focus on smooth curves and avoid adding too many details. The goal is to keep the design simple and visually balanced.
Once the main shape is complete, adjust the thickness of certain lines to add subtle depth. This style works well for logos, icons, or aesthetic sketches, and it trains you to simplify complex shapes into clean forms.
Related blog post: How to Draw Roses Step by Step?
4. Realistic Hibiscus Flower Drawing
A realistic hibiscus drawing focuses on depth, shading, and detail. This style helps you improve observation and create more lifelike results.

Start with a detailed outline, then observe how light hits each petal. Add shading where the petals overlap or curve inward. Use soft pencil strokes and build layers gradually.
Blend your shading with a tissue or blending tool to create smooth transitions. Pay attention to the center of the flower, since this area often has more contrast.
This approach improves your observation skills and teaches you how to create depth.
5. Cute Hibiscus Cartoon Drawing
A cute hibiscus cartoon drawing gives the flower a playful and friendly look. This style works well for stickers, social media content, and simple designs.
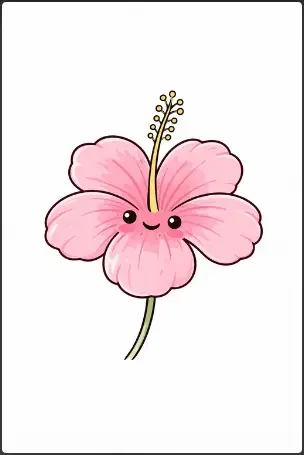
Draw rounder and softer petals to give the flower a playful look. You can exaggerate the shape slightly to make it more appealing. Add a small face in the center if you want a character-style design.
Keep the lines bold and clean. Use simple colors if you decide to fill the drawing. This style helps you explore creativity while keeping the process easy.
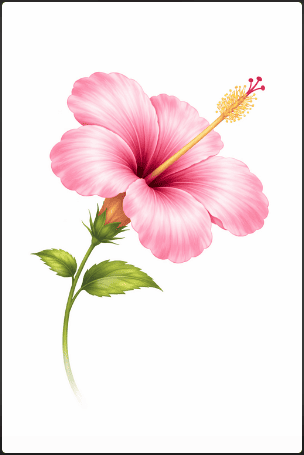
6. Hibiscus Flower with Leaves Drawing
This drawing idea adds leaves to the hibiscus flower to create a fuller composition. It helps you practice drawing multiple elements together.
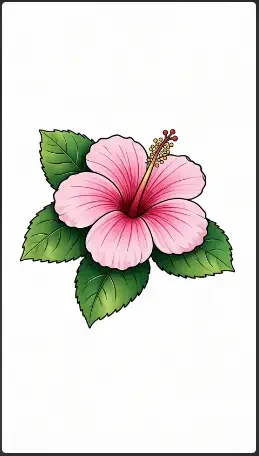
You need to start with the main flower, then add large tropical leaves around it. Use simple shapes for the leaves and draw a central vein with smaller lines branching out.
Balance the composition so the leaves support the flower without taking too much attention. This helps you improve layout and understand how elements work together in a drawing.
7. Colored Hibiscus Drawing with Markers
A colored hibiscus drawing focuses on using bright tones to make the flower stand out. This style helps you practice color layering and contrast.
Choose bright colors like red, pink, or yellow. Fill each petal with a base color first. Then add a darker shade near the center to create depth.
Blend the colors while the ink is still fresh to avoid harsh lines. Keep your strokes consistent and follow the direction of the petals. This method improves your control over color and shading.
Related posts:


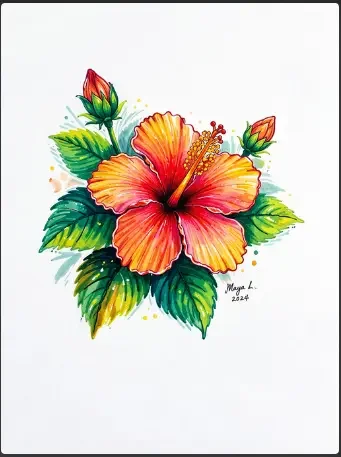
8. Hibiscus Watercolor Style Drawing
A watercolor hibiscus drawing uses soft edges and blended colors. This style gives your artwork a light and natural look.
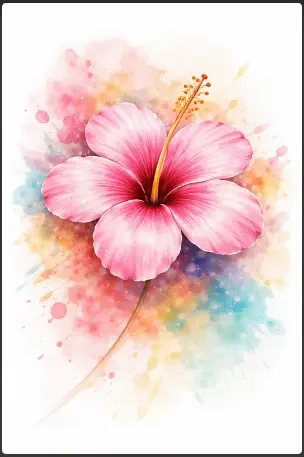
Lightly sketch the flower before applying paint. Use a small brush and start with diluted color. Let the pigment spread naturally across the paper.
Add darker tones gradually to define the center and edges. Allow each layer to dry before adding more detail. This technique improves your control over water and color flow.
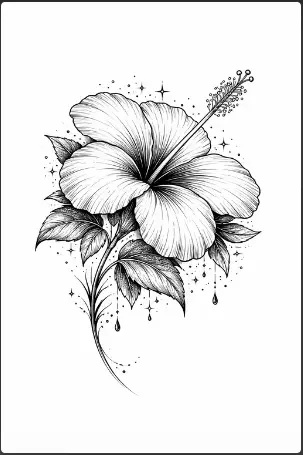
9. Black and White Hibiscus Sketch
A black and white hibiscus sketch removes color and focuses on shading and contrast. This approach strengthens your drawing fundamentals.
Use a pencil or fine liner to create the full drawing without color. Focus on adding depth through shading techniques like cross-hatching or soft gradients.
Keep your shadows consistent with a single light source. This helps your drawing look more realistic and structured while improving your shading skills.
10. Hibiscus Mandala Style Drawing
A hibiscus mandala drawing combines the flower shape with repeating patterns. This style is detailed and requires focus on symmetry.
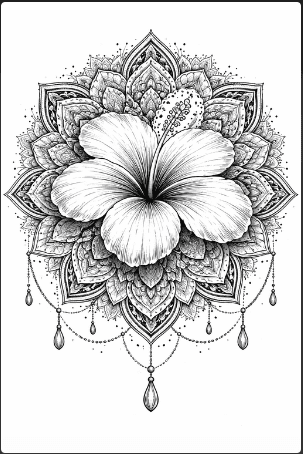
Draw a central hibiscus shape, then repeat petal patterns around it. Keep the spacing even to maintain symmetry.
Fill each section with small patterns like dots, lines, or curves. Take your time with details to keep the design clean. This style improves precision and pattern control.
11. Side View Hibiscus Drawing
A side-view hibiscus drawing shows the flower from a different angle. This helps you understand perspective and form.

Instead of drawing the flower from the front, sketch it from an angle. Start with the base shape and build the petals as overlapping forms.
Pay attention to perspective and how each petal sits behind another. This approach improves your ability to draw depth and adds variety to your work.
12. Hibiscus Digital Drawing(Procreate Style)
A digital hibiscus drawing uses tools like Procreate to create clean and polished artwork. This style works well for modern illustrations and content creation.
Begin with a rough sketch on a separate layer. Lower the opacity, then create clean line art on top using a smooth brush.
Add colors on new layers and use blending tools for soft gradients. Work in sections to keep your file organized. This workflow helps you stay efficient and improve your digital drawing process.
13. Hibiscus Tattoo Style Drawing
A hibiscus tattoo-style drawing focuses on bold lines and clear shapes. This style is designed to stay sharp and readable.
Use strong outlines to define each petal. Keep the shapes clean and balanced so the design stands out.
You can add simple inner details like lines or dots to enhance the look without making it too complex. Focus on clarity and structure, since tattoo designs need to work at different sizes.
Conclusion
Hibiscus flower drawings are a great way to improve your drawing skills. The shape is simple, so you can focus on learning step by step.
At the same time, you can create clean and beautiful designs without feeling overwhelmed.
In this guide, you saw 13 different hibiscus drawing ideas. Some are simple, like outlines and line art. Others include shading, color, or digital styles.
Because of this, you can choose a style that fits your level and practice at your own pace.
I recommend that you start with one easy drawing and repeat it a few times. Then move to a new style when you feel ready. With regular practice, your lines will get cleaner, and your drawings will look better.
More blog posts:


FAQs About Hibiscus Drawing
Here are some frequently asked questions:
How do you draw a hibiscus flower step by step?
You need to start by drawing a small circle in the center. Then add five large petals around it with curved lines. After that, draw the long Stamen in the middle. Finally, refine your lines and erase any extra marks.
Is the hibiscus flower drawing good for beginners?
Yes, it is a good choice for beginners. The petals are large and easy to shape. This helps you learn basic drawing skills without too much difficulty.
What is the easiest hibiscus drawing style to start with?
The easiest style is a simple outline drawing. It focuses on the main shape only. Because of this, you can practice without worrying about details.
How do you make a hibiscus drawing look realistic?
Add shading to your drawing. Focus on darker areas near the center and where petals overlap. Also, use light and smooth strokes to blend the shading.
What colors are used for hibiscus flower drawings?
Common colors include red, pink, yellow, and orange. You can also mix colors to create soft gradients from the center to the edges.
Can you draw a hibiscus flower digitally?
Yes, you can draw it on apps like Procreate. Start with a rough sketch, then add clean lines and color on separate layers. This makes your work easier to edit.
How can you improve your flower drawing skills?
Practice often and keep your process simple. Start with basic shapes, then add details slowly. Also, use references and repeat your drawings to get better over time.