
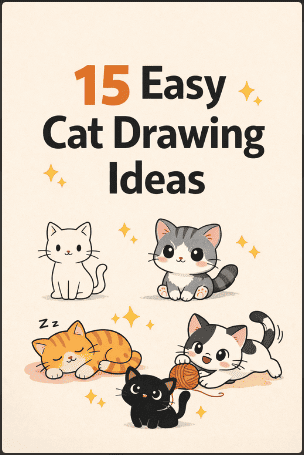
15 Easy Cat Drawing Ideas for Beginners
If you are looking for easy cat drawing ideas for beginners, you are in the right place. Cats are one of the simplest and most fun things to draw, especially when you start with basic shapes.
Sometimes you do not know what to draw next. Because of that, you stop practicing. This list solves that problem.
You will get 15 simple cat drawings you can draw right away. Each one focuses on easy shapes and clear lines.
You can use these ideas to practice every day and fill your sketchbook. You need to start with one idea, then keep going. Over time, your drawings will improve. So let’s get right into it.
Note: Some links in this article are affiliate links. We get a small commission when you buy a product using our link.
Cat Drawing Supplies You Need
Before you start drawing cats, set up a few basic tools that make the process easier and more enjoyable. You do not need professional or expensive materials.
There are simple supplies that give you everything you need to practice and improve. The goal is to keep your setup clean and easy to use so you can focus on your lines, shapes, and proportions.
Here are the basic supplies you need:
Pencil: Use an HB pencil for most drawings. You can use 2H for light sketching and 2B for darker lines.
Eraser: A soft white eraser removes lines cleanly. A kneaded eraser helps you lighten lines.
Paper: Printer paper works fine. But a sketchbook gives better control and cleaner results.
Black pen or fineliner: Use this to trace your final lines and make your drawing look clean.
Colored pencils: Good for soft and controlled coloring.
Markers: Good for bold and smooth colors.
Optional tools:
Ruler: Helps with straight lines in some drawings.
Blending tool: Useful if you start shading.
Keep your tools simple. Always remember that practice matters more than materials.
Related blog post: 15 Easy Doodle Drawing Ideas for Beginners.
15 Easy Cat Drawing Ideas
This list offers easy cat ideas you can practice today. In addition to that, you get tips that improve your line control, proportions, and confidence.
Here are some cute cat drawing ideas:
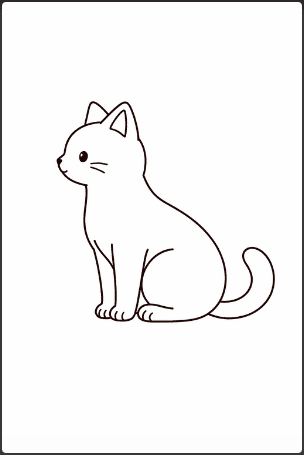
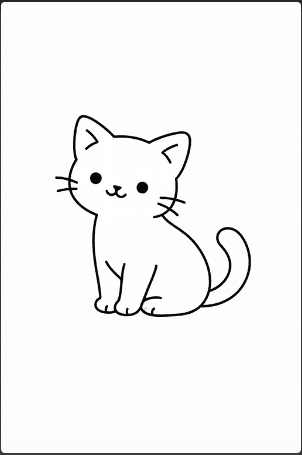
1. Simple Sitting Cat Outline
For this idea, you can start with a circle for the head and a vertical oval for the body. Place the head slightly above the body so the pose looks natural.
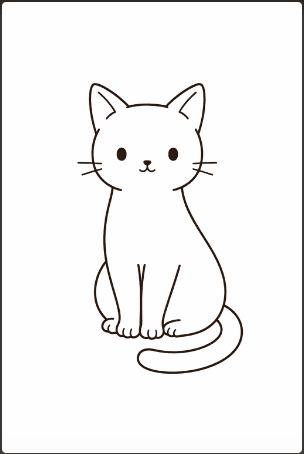
After that, draw two small triangles for the ears. Keep them symmetrical but not perfectly identical, since slight variation makes the drawing feel more organic.
Next, connect the head to the body using two curved lines. One line forms the back, and the other forms the chest. Keep both lines smooth and avoid sharp angles.
Add two front legs as simple straight lines that extend downward. Then draw the back legs slightly wider to show weight distribution.
For the tail, draw a long curved line that wraps around the body or rests on the ground. This adds balance to the composition. Once the structure looks correct, go over your clean lines and erase the rough sketch underneath.
This exercise helps you understand basic proportions and posture. If your drawing looks off, check the size relationship between the head and body first.
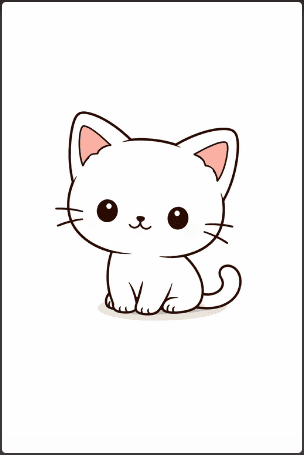
2. Cute Cartoon Cat Face
Draw a clean circle and lightly divide it with a vertical and horizontal guideline. These lines help you place the features evenly.
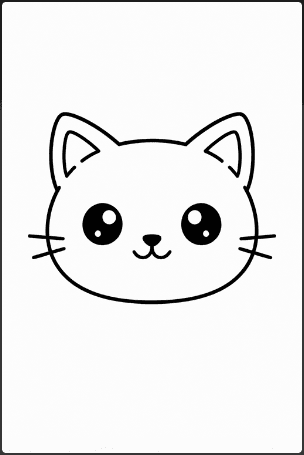
Add two large oval eyes along the horizontal line. Make sure to leave enough space between them so the face does not feel crowded.
Place a small triangle nose slightly below the center. From the nose, draw two soft curves that form the mouth. Keep the expression simple and friendly.
Add whiskers on each side using short straight lines. Do not overdo this detail. Three whiskers per side look balanced.
Draw the ears on top of the head and add a smaller triangle inside each ear for detail. You can also add small highlights inside the eyes to give them more life.
This idea trains your eye for symmetry and spacing. If something looks wrong, measure the distance between the eyes and compare both sides of the face.
Related blog post: 13 Drawing Ideas for Beginners.
3. Sleeping Cat Pose
Start with a large curved oval that looks like a bean shape. This forms the body. Then draw a smaller circle tucked into one side for the head. Position the head so it looks like the cat is resting against its body.
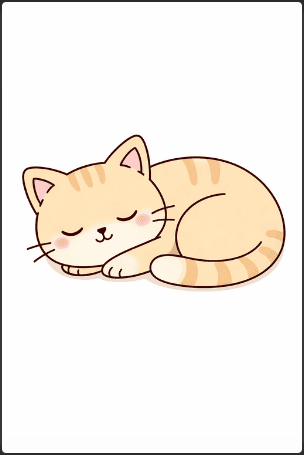
Add a tail that wraps around the body and closes the shape. This creates a compact and peaceful pose. Keep all lines soft and rounded. Avoid sharp corners because they break the relaxed feeling.
You can add small details like closed eyes using simple curved lines. Keep the ears slightly flattened to match the resting position.
This drawing improves your sense of flow and composition. The goal is to create one continuous shape that feels complete and balanced.
4. Side View Cat (Profile)
For this idea, you need to draw a small circle for the head and a longer oval behind it for the body. Connect them with a smooth line for the neck. Extend a short line forward from the head to form the nose.
Place the eye closer to the front of the head. This detail is important because placing it in the center will make the face look incorrect. Add one visible ear and shape the jawline with a gentle curve.
Draw the front legs straight down and the back legs slightly bent. Keep the body line smooth from head to tail. Add a curved tail that follows the direction of the body.
This exercise builds your understanding of structure and perspective. Side views force you to think about how forms connect rather than relying on symmetry.
5. Chibi Style Cat
Draw a large round head and a very small oval body underneath. The head should take up most of the space. This exaggerated proportion creates a cute appearance.
Add tiny legs that barely extend from the body. Keep them simple and avoid adding too much detail. Draw a short tail and place it slightly to one side.
For the face, use minimal features. Two small dots for eyes and a tiny mouth work well. You can add blush marks or small lines near the cheeks to enhance the style.
This style is useful for beginners because it simplifies anatomy. It also helps you focus on proportions instead of complex details.
6. Stretching Cat
Start with a long curved line that represents the spine. This line determines the entire pose, so take your time to get it right. Add the head at one end and extend the front legs forward.
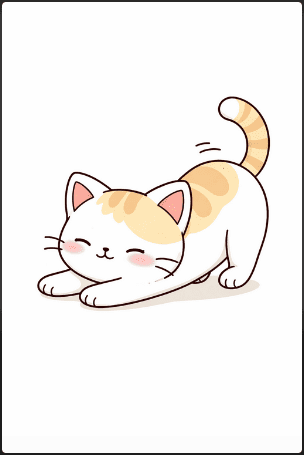
Draw the back legs stretched behind the body. Keep the shape elongated to show tension and movement. Avoid compressing the body, as this will remove the stretching effect.
Add a tail that follows the flow of the spine. The tail should not feel disconnected from the body.
This idea improves your gesture drawing skills. You learn how to capture movement using simple lines before adding details.
7. Cat with Big Eyes
Draw a standard head shape and then place oversized eyes in the center. The eyes should take up a large portion of the face. This creates a strong focal point.
Add small highlights inside the eyes to make them look alive. Keep the nose and mouth small, so they do not compete with the eyes.
Draw the ears and outline the face with smooth lines. You can slightly enlarge the head to match the eye size.
This exercise teaches you how to control emphasis. When one feature stands out, the rest of the design should support it instead of competing with it.
8. Minimal Line Cat
Draw the cat using as few lines as possible. Try to create the entire outline in one continuous motion. Focus only on the silhouette.
Avoid adding details such as fur, facial features, or shading. The goal is to communicate the shape with minimal information.
Keep your hand steady and move slowly. If your line becomes shaky, reduce your speed and apply consistent pressure.
This practice builds line confidence and precision. Over time, your drawings will look cleaner and more intentional.
9. Cat Sitting in a Box
Draw a simple box using straight lines. Make sure the perspective looks correct, with parallel edges aligned properly. Then draw a cat sitting inside the box.

Show only the upper body and head. Let the front paws rest over the edge of the box. Add a tail that curves around one side.
You can slightly bend the edges of the box to make it feel less rigid. This small adjustment adds a natural touch.
This idea helps you combine characters with objects. You learn how to place subjects within a defined space.
Here are some related posts you might find useful:


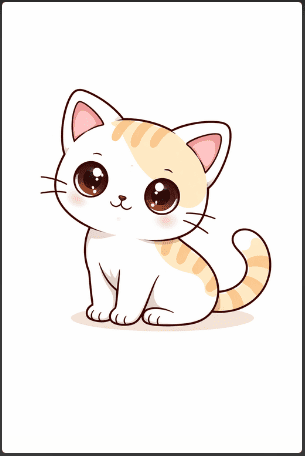
10. Playful Kitten
Draw a small body with slightly oversized paws. This creates a youthful look. Tilt the head to one side to add curiosity.
Raise one paw as if the kitten is reaching for something. Keep the pose dynamic but balanced. Add a curved tail that supports the movement.
Use simple facial features to show emotion. Small changes in eye shape can make the kitten look curious or excited.
This drawing teaches you how to create personality through pose and proportion. Try different variations to see how small changes affect the result.
11. Cat Silhouette
Start by drawing a clear outline of a cat. Focus on the ears, back curve, and tail shape. These features define the silhouette.

Fill the entire shape with black or a single color. Do not include internal details. The outline should remain readable even without features.
Check your shape by zooming out or stepping back. If the cat is still recognizable, your silhouette works.
This exercise improves your understanding of strong shapes and composition. It also helps you simplify complex forms.
12. Realistic Cat Head(Simple Version)
Draw a circle and add guidelines for the face. Place the eyes slightly below the center line. This matches real cat proportions.
Add structure to the nose and define the muzzle area. Keep the lines light and controlled. Use short strokes to suggest fur instead of drawing every strand.
Focus on symmetry and spacing. Make sure both sides of the face align properly.
This approach builds a foundation for realistic drawing. Accuracy matters more than detail at this stage.
13. Cat Looking Up
Draw the head tilted upward. This changes how the features align. The nose points up, and the eyes shift slightly lower on the face.

Add a curved neck that supports the head position. Keep the transition between head and body smooth.
Pay attention to perspective. The lower part of the face becomes more visible when the head tilts upward.
This idea helps you understand how angles affect structure. Practice with references to improve accuracy.
14. Walking Cat Drawing
Draw a horizontal line for the back. This keeps the posture stable. Add the legs in alternating positions. One front leg moves forward while the opposite back leg moves forward.
Keep the spacing between the legs even. This ensures the cat looks balanced while walking.
Add a tail that follows the direction of movement. The tail often curves slightly upward.
This exercise improves your understanding of motion. Studying simple walk cycles will make your drawings more natural.
15. Fluffy Cat Drawing
I recommend that you start with a basic cat shape. Then break the outline using small zigzag lines to represent fur.
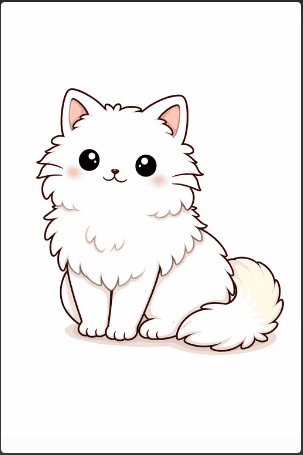
Focus on key areas like the chest, cheeks, and tail. These areas usually have more volume. Avoid adding too many spikes, as this makes the fur look messy.
Vary the length and direction of your lines. This creates a more natural texture.
This idea teaches you how to suggest detail without overcomplicating the drawing. Controlled variation is the key to making fur look believable.
Conclusion
Drawing cats becomes easier when you break each idea into simple steps and repeat them often. You do not need complex techniques to improve.
Focus on clean shapes, steady lines, and correct proportions. You need to start with the easier ideas, then move to slightly more detailed ones as your confidence grows.
Stay consistent with your practice. Even 10 to 15 minutes a day will improve your control and accuracy.
Keep your drawings simple at first, then refine them once your structure looks right. Over time, you will notice better line quality, better balance, and more natural poses.
You can use this list as a practice routine. Repeat each idea several times instead of drawing it once. This approach builds real skill and helps you see progress faster.
More blog posts:


FAQs About Cat Drawings
Here are some frequently asked questions:
How do you draw a cat step by step for beginners?
Start with simple shapes like a circle for the head and an oval for the body. Connect them with smooth lines to form the cat’s structure. Add ears, legs, and a tail. Once the basic shape looks correct, refine your lines and add simple details like eyes and whiskers. Keep your first sketch light so you can adjust easily.
What is the easiest cat drawing for beginners?
A simple sitting cat outline is the easiest place to start. It uses basic shapes and requires minimal detail. This helps you focus on proportions and clean lines without feeling overwhelmed.
How can I make my cat drawings look better?
Focus on three things. Keep your lines clean, maintain correct proportions, and simplify your shapes. Avoid adding too many details too early. Practice the same drawing multiple times and compare your results to see improvement.
How do you draw a cute cat face easily?
Draw a circle and place large eyes in the center. Add a small triangle nose and a simple curved mouth. Keep the features balanced and avoid overcomplicating the details. Big eyes and small features create a cute look.
What supplies do I need to draw cats?
You only need a pencil, eraser, and paper to start. A fineliner helps you clean up your final lines. Colored pencils or markers can be added if you want to include color, but they are optional.
How long does it take to learn cat drawing?
You will see improvement within a few days if you practice daily. Most beginners notice clear progress after one to two weeks of consistent drawing. The key is repetition and focusing on simple shapes first.
Should I use references when drawing cats?
Yes. References help you understand real shapes, poses, and proportions. Even simple references can improve your accuracy and make your drawings look more natural.
Why do my cat drawings look off?
This often comes from incorrect proportions or uneven spacing. Check the size of the head compared to the body and the placement of the eyes. Use light guidelines to fix alignment before adding details.
Can I draw cats without any experience?
Yes. Cat drawings are beginner friendly because they rely on simple shapes. Start with basic outlines and practice regularly. You do not need prior experience to improve quickly.
How often should I practice drawing cats?
Practice daily if possible. Even short sessions help. Focus on repeating the same drawing a few times instead of moving to new ideas too quickly. This builds consistency and better results.