
13 Easy Acrylic Marker Drawing Ideas for Beginners
If you’re looking for easy acrylic marker drawing ideas, you have come to the right place, my friend.
Acrylic marker drawings are one of the easiest ways to create colorful art without using paintbrushes or complex tools. If you want fun art prompts that look impressive but still feel simple to draw, you are in the right place.
Acrylic markers give you smooth coverage, bright color, and clean lines. They work well for beginners, hobby artists, and anyone who wants quick creative results.
At the same time, starting with a blank page often feels hard. You may want to draw something cute, modern, or eye-catching, but you do not know where to begin.
That is why this list brings together easy ideas you can try right away. From tropical leaves and sunset mountains to kawaii food and abstract shapes, these prompts help you practice without feeling stuck.
In this article, you will find 13 simple ideas that are easy to copy and perfect for sketchbooks, paper, canvas, or even DIY decor.
So if you want inspiration that helps you start fast and keep drawing, keep reading. So let’s get started.
Note: Some links in this article are affiliate links. We will get a small commission at no cost to you if you buy something using our link.
13 Easy Acrylic Marker Drawing Ideas
Acrylic markers help you create bold drawings with less effort. They produce strong color, smooth coverage, and clean outlines, so beginners achieve good results faster.
For this reason, many artists use acrylic markers for sketchbooks, canvas boards, and decorative art.
Related blog post: 13 Drawing Ideas for Beginners.
The following acrylic marker drawing ideas focus on simple shapes, balanced compositions, and clear color contrast. Each idea helps you practice control, layering, and creativity.
1. Abstract Geometric Shapes
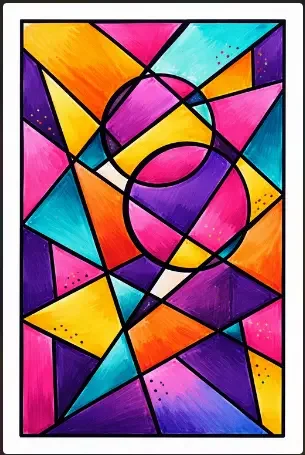
Abstract geometric artworks work well with acrylic markers because the paint fills shapes evenly and creates strong contrast.
First, draw a mix of triangles, circles, and rectangles across the page. Then overlap the shapes slightly so the design feels more dynamic.
Next, fill each shape with bold colors such as pink, orange, and purple. After that, outline the shapes using a black acrylic marker to improve contrast. As a result, the drawing looks modern and visually balanced.
Simple steps:
• Draw large shapes first so the layout feels balanced.
• Fill each shape with a solid color for a strong contrast.
• Add outlines or small dots for extra detail.
2. Cute Kawaii Food Illustrations

Kawaii food drawings attract attention because they combine simple shapes with expressive faces. First, draw basic forms such as cupcakes, donuts, or sushi. Then use thick outlines so each object stands out clearly.
Next, add small facial features such as round eyes and a smiling mouth. After that, place glossy highlights using a white marker. This small detail adds depth and makes the drawing feel lively.
Helpful tips:
• Use pastel colors for a softer style.
• Add small blush circles under the eyes.
• Draw several food items together for a playful layout.
3. Minimalist Portrait Silhouettes
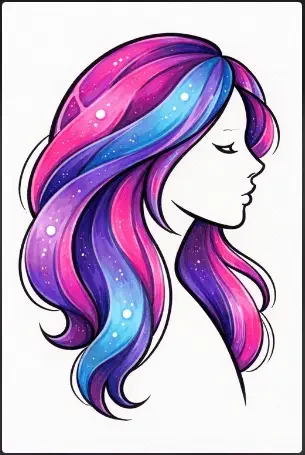
Minimalist portraits focus on simple lines and bold color shapes. First, draw a clean side profile of a face. Then keep the facial details minimal so the composition stays elegant.
Next, fill the hair with flowing shapes using bright colors such as pink, blue, or purple. As a result, the hair becomes the focal point of the drawing. In addition, a simple background keeps the artwork balanced.
To improve the result:
• Use a single continuous line for the face outline.
• Add abstract shapes within the hair.
• Keep the background mostly empty.
Related blog post: 9 Art Therapy Activities for Adults.
4. Tropical Leaves Drawing
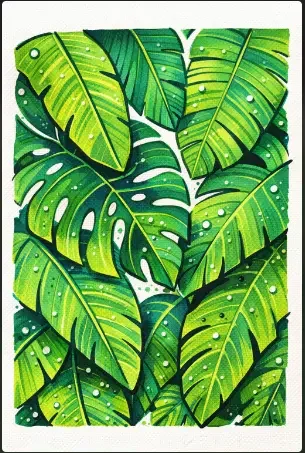
Tropical leaves create bold shapes that work well with acrylic markers. First, sketch large leaves such as monstera or banana leaves. Then overlap several leaves so the drawing gains depth.
Next, fill the leaves with different green shades. After that, add thin vein lines across the surface. Small white dots placed on the leaves can represent water droplets and add texture.
Drawing tips:
• Use dark green outlines to strengthen the shapes.
• Add lighter green highlights near the edges.
• Vary leaf sizes for a balanced composition.
5. Sunset Mountain Landscape

A sunset landscape allows you to practice color layering with acrylic markers. First, draw a simple horizon line. Then sketch several mountain shapes stacked behind one another.
Next, fill the mountains using warm ombre shades such as orange, red, and purple. Afterward, add a darker foreground with small trees or grass shapes. Finally, place tiny white dots in the sky to create stars.
Helpful structure:
• Light colors in the background.
• Darker tones in the foreground.
• Simple mountain shapes for clarity.
6. Whimsical Mushroom Cluster
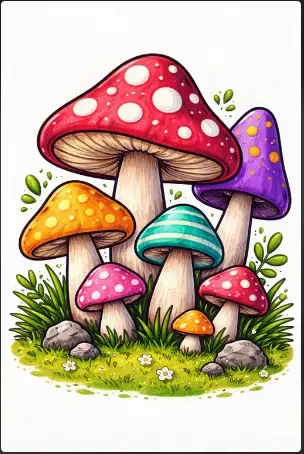
Mushroom drawings work well because they rely on simple shapes and playful details. First, draw several mushroom caps of different sizes. Then connect them using curved stems.
Next, decorate each cap with dots, stripes, or small patterns. As a result, the drawing looks lively and imaginative. In addition, grass or tiny plants around the mushrooms help complete the scene.
Useful ideas:
• Add small plants or stones around the mushrooms.
• Use bright caps such as red, orange, or purple.
• Combine tall and short mushrooms for variety.
Related posts:


7. Ocean Waves Illustration
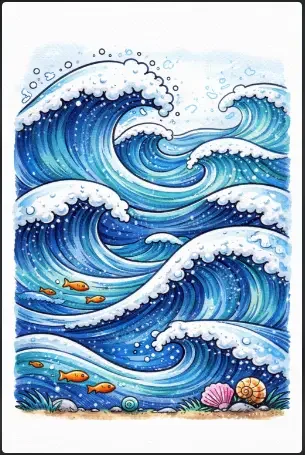
Ocean waves help you practice smooth curves and layered shapes. First, draw several wave lines flowing across the page. Then place additional waves behind them to create depth.
Next, fill the waves with different shades of blue. After that, add white foam near the top of each wave. Small details, such as fish or shells, can appear between the waves.
Drawing tips:
• Use darker blue below each wave.
• Add white highlights for movement.
• Keep curves smooth and consistent.
8. Butterfly Wings Pattern
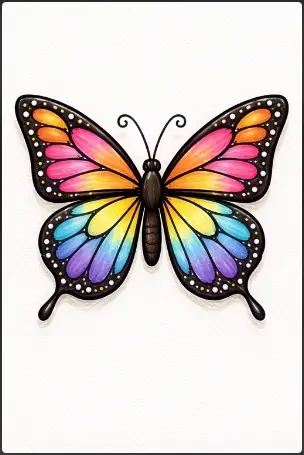
Butterflies allow symmetrical designs filled with color and patterns. First, draw the butterfly body in the center of the page. Then add two wings on each side.
Next, divide the wings into sections using curved lines. After that, fill each section with bright colors or repeating shapes. This approach makes the wings look detailed while remaining manageable.
Helpful techniques:
• Mirror shapes on both wings.
• Use white dots to create highlights.
• Add thin lines to represent wing veins.
Related blog post: 15 Easy Doodle Drawing Ideas for Beginners.
9. City Skyline at Night
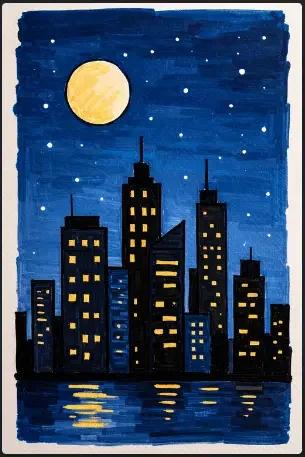
A city skyline drawing uses simple shapes to represent buildings. First, draw rectangles with different heights across the page. Then place the tallest buildings near the center.
Next, fill the buildings with dark blue or black to create a nighttime effect. Afterward, add small yellow squares for windows. These small details bring life to the skyline.
Composition tips:
• Vary building heights and widths.
• Place a moon above the skyline.
• Add stars in the night sky.
10. Enchanted Forest Scene
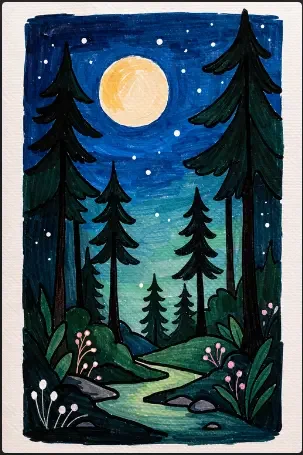
An enchanted forest drawing combines simple trees with magical elements. First, draw tall tree trunks and branches across the page. Then keep the shapes slightly curved so they look natural.
Next, add glowing mushrooms and small plants near the ground. After that, place many tiny dots throughout the scene to represent fireflies. As a result, the drawing gains a magical atmosphere.
Helpful elements:
• Use dark greens and browns for trees.
• Add bright mushrooms for contrast.
• Scatter glowing dots around the forest.
11. Zodiac Symbol Art
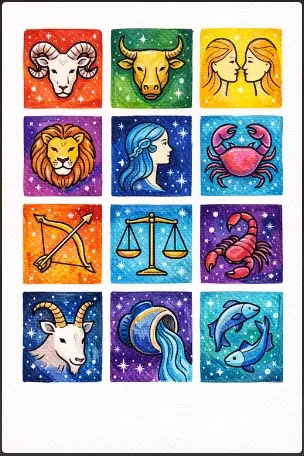
Zodiac symbols create decorative artwork with cosmic themes. First, draw a zodiac symbol such as Aries, Leo, or Libra in the center of the page.
Next, fill the background with stars and cosmic shapes. Purple, blue, and gold color combinations work well for this theme. In addition, a circular border around the symbol creates a balanced design.
To improve the design:
• Draw small star clusters around the symbol.
• Add a circle frame for structure.
• Use metallic markers if available.
12. Vintage Camera Illustration
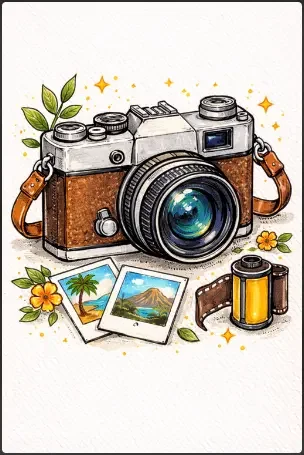
Vintage cameras provide an interesting drawing subject because they combine basic shapes with small details. First, draw a rectangular camera body. Then, place a large circle in the center for the lens.
Next, add smaller elements such as buttons, film slots, and viewfinders. After that, draw white highlights around the lens to create a reflective effect.
Helpful structure:
• A large circular lens in the center.
• Small rectangles for buttons and controls.
• Thin outlines to sharpen details.
13. Floating Balloons in the Sky

Balloon drawings create a playful and light composition. First, draw several round or oval balloons across the page. Then attach curved strings beneath each balloon.
Next, fill the balloons with bright colors such as red, yellow, and blue. Afterward, draw soft clouds in the background to complete the sky scene.
Simple ideas:
• Use different balloon sizes.
• Place clouds in the background.
• Add small highlights to each balloon.
Acrylic Marker Drawing Supplies
Before you start these acrylic marker drawing ideas, prepare a few basic supplies. Acrylic markers work on many surfaces, so the right materials help you achieve cleaner lines and stronger color coverage.
The following tools support beginners and help you get consistent results.
Here are some supplies you might need:
• Acrylic paint markers with medium or brush tips.
• Smooth paper, marker paper, or a sketchbook with thick pages.
• A pencil for light sketching before adding a marker.
• A white acrylic marker for highlights and details.
• A black acrylic marker for outlines and contrast.
Optional tools:
• Ruler for geometric drawings.
• Compass for circles and patterns.
• Canvas boards for wall art projects.
More reading: 15 Cute Bible Verse Drawing Ideas.
Conclusion
As you can see, acrylic marker drawing ideas help you start drawing faster and practice color layering with simple tools.
Acrylic markers produce bold color, clean lines, and smooth coverage, so beginners achieve strong results without complex techniques.
You can start with simple shapes and clear outlines. Then add color layers, highlights, and small details to improve each drawing.
With regular practice, these acrylic marker drawing ideas help you build confidence and develop your own style.
More blog posts:


FAQs
Here are some frequently asked questions about acrylic marker drawings:
What surfaces work best for acrylic marker drawings?
Acrylic markers work well on many surfaces. Smooth sketchbook paper, marker paper, canvas boards, wood, and rocks often produce the best results. Smooth surfaces help the paint flow evenly and create cleaner lines.
Are acrylic markers good for beginners?
Yes. Acrylic markers suit beginners because they combine paint and marker control. You draw directly with the pen, so you avoid brushes and water. This process makes drawing easier and faster to learn.
Do acrylic markers bleed through paper?
Some acrylic markers bleed through thin paper because the paint stays wet longer. Thick sketchbook paper or marker paper helps prevent this problem. Paper with higher weight usually works better.
How do you make acrylic marker drawings look better?
Strong drawings rely on simple techniques. Use bold outlines, solid color blocks, and small highlights. In addition, layer colors and vary shapes to create more visual interest.
What can you draw with acrylic markers?
You draw many subjects with acrylic markers. Popular examples include flowers, mushrooms, landscapes, butterflies, abstract shapes, and cute characters. These subjects work well because they use simple shapes and bright colors.