
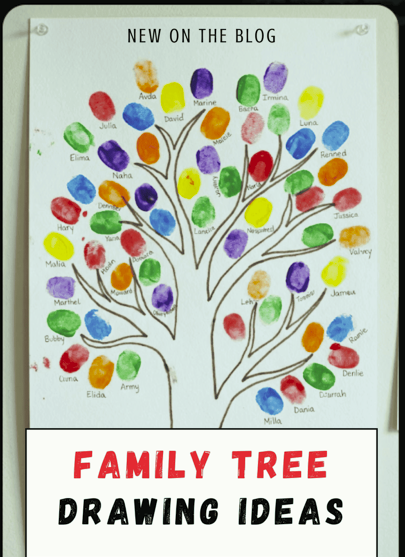
9 Easy Family Tree Drawing Ideas You'll Actually Love
Are you looking for creative and easy family tree drawing ideas? If so, you have come to the right article. I know you want to draw your family tree, but you feel stuck. Don’t worry, I’m here to give you some ideas and inspiration.
Family tree drawing is actually super fun and easier than you might think. Plus, you don't need to be a great artist to create something really special.
Maybe you're working on a school project and need something quick. Or perhaps you want to make a sweet gift for your grandparents. Either way, I will give you easy design ideas for your family tree that will help you get started today.
Here's what makes these designs so great: they use simple supplies you already have at home. Just grab some paper, markers, and a few family photos. That's it!
In this article, we're sharing 9 creative family tree drawing ideas that actually work for beginners. Some take just 15 minutes to finish. Others turn into fun activities you can do with your whole family. So let’s get started.
1. Hand-Drawn Silhouette Tree
The hand-drawn silhouette is about a bold black tree with names in speech bubbles. To use this idea, start by drawing a bold black tree trunk with roots spreading across white paper.

You need to keep your lines simple and clean. As a result, this creates a striking contrast that really stands out.
Next, add cute speech bubbles along each branch. You can start at the bottom with your oldest ancestors, then work your way up through the generations. Finally, slip small photos inside each bubble to put real faces to the names.
This minimalist design looks incredibly professional. In addition to that, it prints beautifully if you want to frame it or share copies with family members.
Related blog post: Cool Things to Draw on Your Hand.
Helpful tips to make it even better:
Use a thick black marker or brush pen for the trunk to create deeper lines.
Make the roots spread wide across the bottom. This will symbolize strong family foundations.
Keep speech bubbles roughly the same size so the design looks balanced.
Print photos in black and white to match the silhouette style.
Leave some white space around the tree so it doesn't feel cramped.
What you'll need:
White cardstock or drawing paper.
Black permanent marker or pen.
Small printed photos(wallet-size works great).
Glue stick.
Ruler(optional for straight bubble lines).
This design might take about 30-45 minutes from start to finish, depending on your level. This can be the perfect project for a weekend afternoon.
2. Modern Circle Family Tree
The idea behind the modern circle family tree is that names should be in circles connected to the center. All that with soft colors and smooth lines.
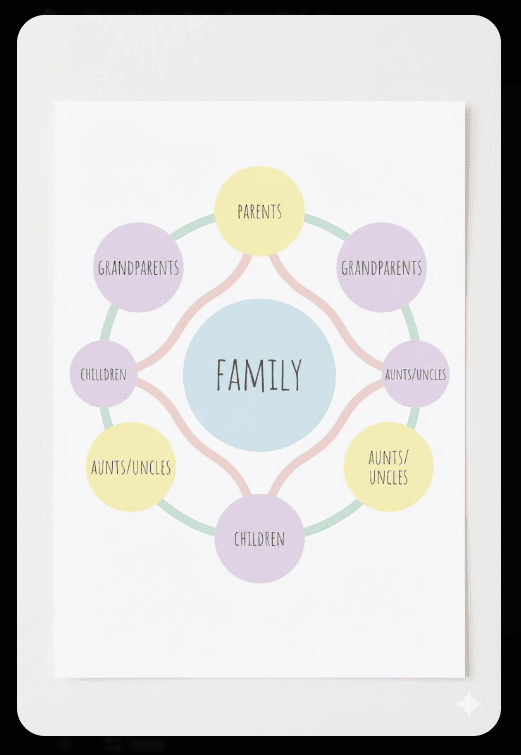
To start with this drawing idea, place your name inside a circle right at the center. Then draw connecting lines to more circles for your parents, siblings, and grandparents.
Here's a helpful tip: use gentle, flowing curves instead of straight lines. This gives your tree a fresh feel that's really beautiful for the eye.
Try color-coding each generation to make relationships clearer. For example, use soft blue for grandparents, warm yellow for parents, and light green for kids. The balanced layout creates an awesome design that people love.
Smart design strategies:
Start with a pencil so you can erase and adjust circle placement.
Make your central circle slightly larger than the others.
Use a compass or trace around cups for great circles.
Keep connecting lines thin and delicate so they don't overpower the names.
Add small decorative elements inside circles, like tiny hearts or stars.
Color-coding ideas that work well:
Grandparents: Soft blues or purples.
Parents: Warm oranges or yellows.
Your generation: Fresh greens or teals.
Children: Bright pinks or coral shades.
Pro tip: If you're including lots of people, sketch it out on scrap paper first to plan your spacing. This prevents running out of room on one side.
This modern approach works beautifully for families of any size and looks awesome when you use watercolor markers or colored pencils.
3. Thumbprint Leaf Tree
This drawing idea is about colorful thumbprints as leaves, each showing a family member’s name. To start this project, you need to sketch out a basic tree shape with branches. But here's the fun twist: don't draw any leaves.
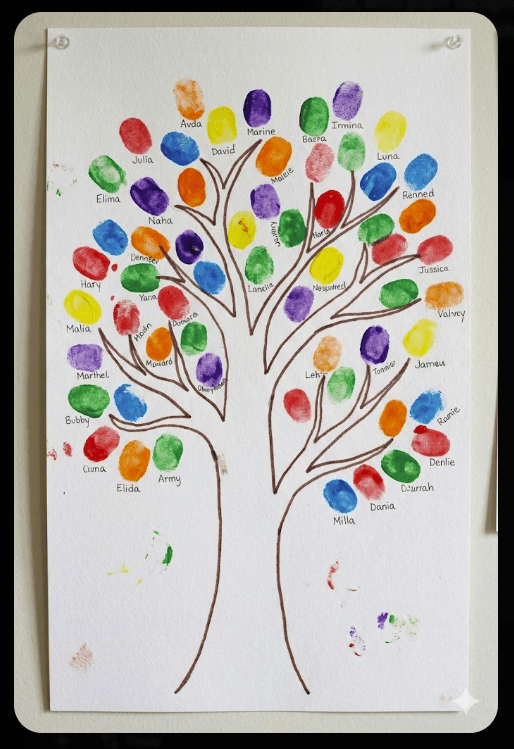
Instead, have each family member press their colorful thumbprints or fingerprints onto the branches. Use different paint colors to make it more beautiful. Then, write names and birth years next to each print so everyone knows who's who.
Kids absolutely adore this project because they get to dip their fingers in paint and make a mess. Better yet, it transforms ordinary fingerprints into a beautiful one-of-a-kind family portrait.
Supplies you'll need:
Sturdy paper or canvas (so the paint doesn't bleed through).
Washable paint in multiple colors.
Baby wipes or a damp cloth for quick finger cleaning.
Fine-tip pen for adding names.
Paper plates for paint(easy cleanup!).
Tips for the best results:
Use acrylic or tempera paint. It shows up brighter than watercolor.
Press thumbs firmly. But don't wiggle them, or the prints get smudged.
Let each layer of prints dry before adding more to prevent smearing.
Assign specific colors to each family branch so you can see connections.
Make the trunk thick and sturdy to support all those colorful leaves.
4. Charming Potted Plant Tree
This idea is about drawing a cute tree growing from a flower pot with small buds. To start this, draw a decorative flower pot at the base of your page. From there, sketch stems growing upward into small boxes or flower buds. Each one represents a family member.
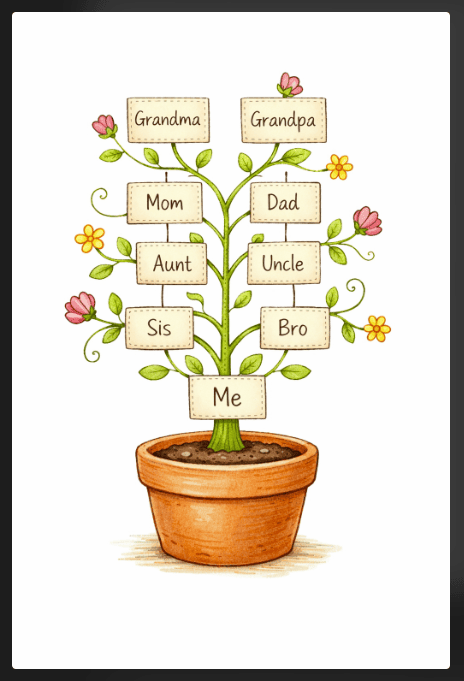
Label every box with a relative's name. To make it extra cozy, add sweet details like curling vines, soil texture, or little decorative patterns on the pot.
This design works wonderfully for smaller families or when you need something compact for your desk. The potted base gives it a grounded charm that makes people smile.
Why is this design so versatile?
Perfect for families with 10-15 members.
Fits nicely in standard picture frames (8x10 or 11x14).
Easy to update when new family members arrive. Just add another stem.
The contained design feels complete and purposeful.
Great for gift-giving because it's compact and personal.
Design elements that add character:
Draw cracks or texture lines on the pot for a handmade look.
Add tiny flowers or buds at the tips of each stem.
Sketch soil or rocks at the pot's rim for realistic detail.
Include a decorative label on the pot with your family name.
Draw small leaves along the stems between name boxes.
This sweet design usually takes 45 minutes to an hour and works beautifully as personalized stationery or greeting cards for family occasions.
5. Vibrant Peacock Feather Tree
If you’re ready to get creative, this artistic design really makes a statement. You will need to draw your tree trunk as usual, but then make the branches fan out dramatically like peacock feathers.

Place name circles on each colorful feather and add eye-like patterns for that signature peacock look. You can use rich and jewel-toned colors.
Think deep blues, emerald greens, and hints of purple. This bold approach stands out beautifully and grabs attention whenever you share it. Your family tree becomes a genuine work of art.
What makes this design unique:
It's a conversation starter. People always ask about it.
The artistic style feels less formal and more celebratory.
Works beautifully as wall art in your home.
Shows personality and creativity in your family presentation.
The symmetrical feather pattern is naturally pleasing to the eye.
Color combinations that wow:
Classic peacock: Royal blue, emerald green, turquoise, and gold accents.
Sunset variation: Deep purples, warm oranges, coral, and pink.
Ocean theme: Navy, teal, aqua, and seafoam green.
Jewel tones: Sapphire, ruby red, amethyst, and emerald.
This show-stopping design takes 2-3 hours, but becomes a cherished family heirloom that people display proudly. It's perfect for creative souls who want something truly unique.
6. Handprint Keepsake Tree
Here's a touching hands-on project the whole family can create together. Trace everyone's actual hands to form large leaves on sturdy branches.
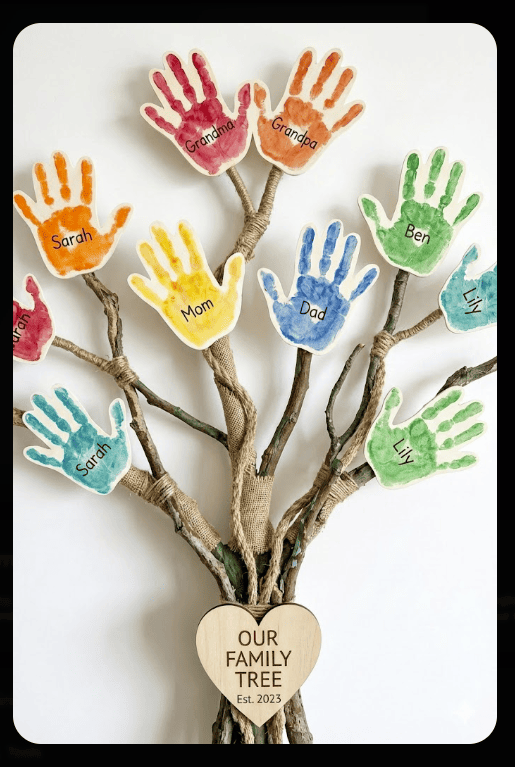
Then, carefully slip small photos into each palm shape. This adds a personal and intimate touch.
You can write names and dates underneath each handprint so you remember the details years from now. Using different colors for each generation helps show how everyone connects across time.
The best part? Making this together becomes a special bonding activity filled with laughter and memories. It's not just a family tree. It's an experience you share.
Why families love this keepsake:
It captures a moment in time. Kids' hands grow, making them even more precious later.
Everyone participates(from toddlers to great-grandparents).
The different hand sizes tell a visual story about your family.
It becomes more meaningful as years pass.
Perfect for documenting multigenerational gatherings.
Supplies you'll need:
Large poster board or canvas (24x36 inches works well).
Pencils for tracing.
Acrylic paints or colored markers.
Small printed photos (wallet or thumbnail size).
Glue dots or photo corners.
Fine-point permanent markers for names.
Plan for 2-3 hours for this project, especially with larger families. The result is absolutely priceless.
Related posts:


7. Simple Vertical Sketch
Sometimes you need something clear and organized, especially with larger families.
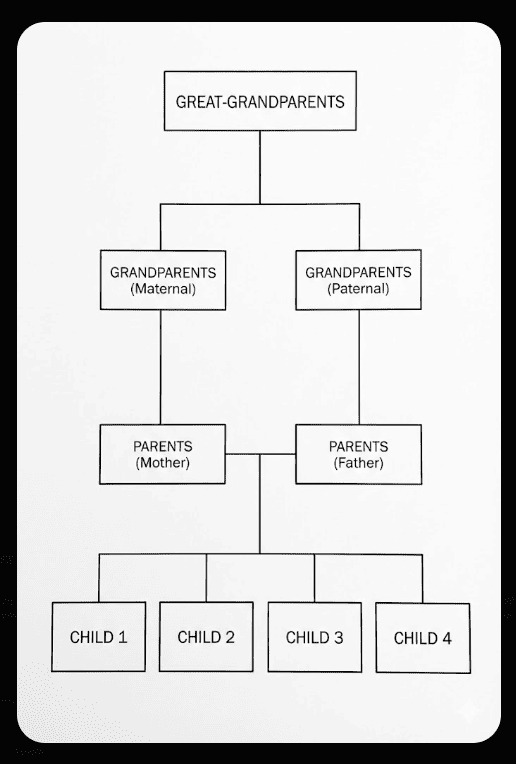
Start by placing your oldest relatives in a box at the very top. Draw straight lines down to boxes for their children, then continue this pattern through each generation, moving downward.
Arrange everything in a grid-like structure, so it's easy to follow. Add small hearts along the connecting lines to show marriages and partnerships.
This clean layout works perfectly when you need clarity and organization. Everyone can see exactly how the family connects at a glance.
When this layout works best:
Large families with 20+ members.
Families spanning 4-5 generations.
School genealogy projects require clear documentation.
When you need to identify family patterns or relationships quickly.
Professional family history presentations.
Organization strategies:
Use a ruler to keep all lines perfectly straight and professional.
Make boxes uniform in size for a clean design.
Space generations evenly down the page.
Leave room at the bottom because families grow.
Number each generation (G1, G2, G3) in the margin for reference.
This practical design takes 1-2 hours, depending on family size. It's the go-to choice when accuracy and clarity matter most.
8. Balanced Horizontal Layout
This one is about drawing a horizontal tree with you in the center and branches for both sides of the family. To start this, put yourself in a box right in the middle of the page. This becomes your starting point.
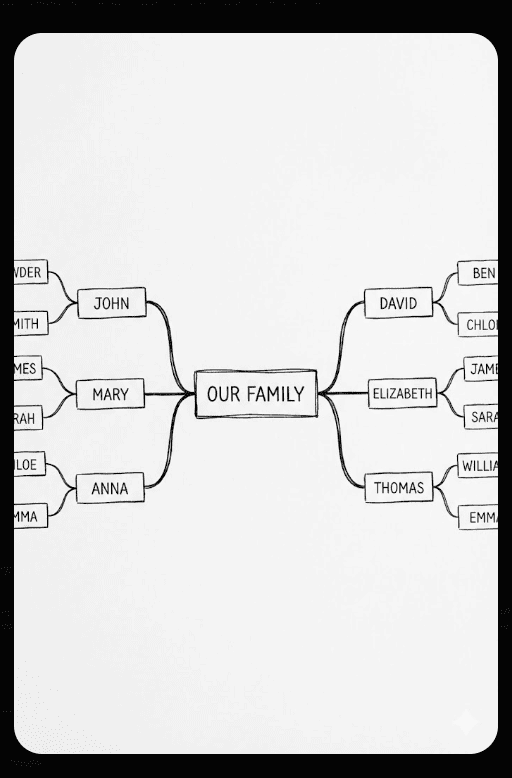
Extend branches to the left for your mom's entire side of the family. Then, extend branches to the right for your dad's side. If one side has more relatives than the other, simply adjust the branch lengths to fit.
Keep it simple by using just names without extra details. This prevents clutter and keeps everything readable.
This horizontal approach handles even complicated family trees without becoming confusing or messy. It's practical and elegant at the same time.
Why this layout is brilliant:
Shows both family lines equally and honors both sides.
Easy to see maternal vs. paternal relationships instantly.
Expands outward naturally as you add more generations.
Your position in the center emphasizes your unique heritage.
Works on landscape-oriented paper for better viewing.
Smart design techniques:
Use different colors for each side(warm tones for one, cool for the other).
Draw thicker lines for your direct ancestors.
Include small symbols (♂/♀) if you're documenting many relatives.
Add birth order numbers for siblings to show age relationships.
Keep the central "you" box slightly larger or decorated.
9. Scrapbook Memory Tree
If you want to create something truly personal, this is your opportunity. To start with this drawing idea, draw your tree on textured paper that feels wonderful to touch. Maybe kraft paper or watercolor paper.
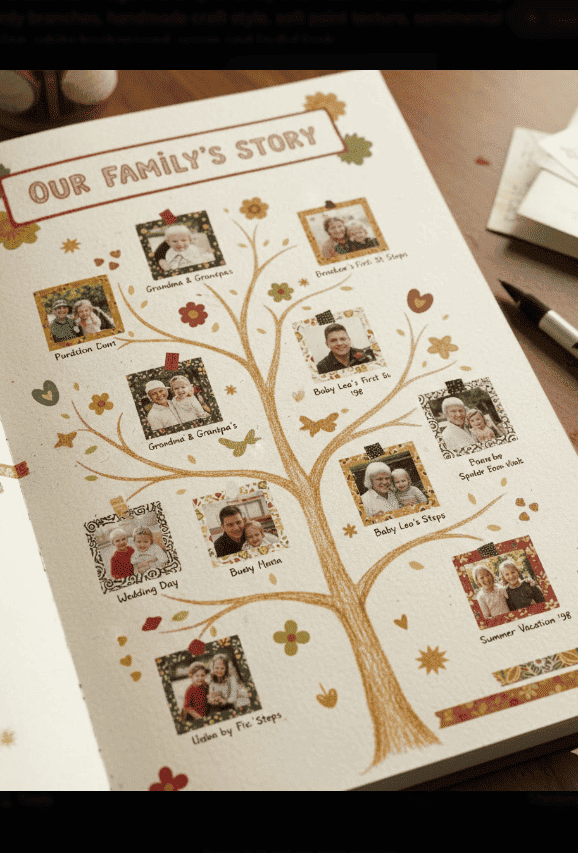
After that, fill the branches with photo corners where you can tuck in favorite family pictures. Then add little handwritten notes about hobbies, cherished memories, or funny family stories beside each photo.
Decorate with stickers, colorful washi tape, or hand-drawn doodles. For extra depth, fold your tree into a booklet format with multiple pages.
This scrapbook-style approach creates more than just a family tree. It becomes a treasured keepsake filled with stories, laughter, and love.
What makes this so meaningful:
It captures personality, not just names and dates.
Stories bring ancestors to life for younger generations.
The handmade quality feels intimate and precious.
You can keep adding to it as new memories form.
It becomes a family heirloom that tells your unique story.
Supplies that bring it to life:
Textured cardstock or scrapbook paper.
Photo corners or adhesive dots.
Washi tape in coordinating patterns.
Stickers (vintage, floral, or themed to your family).
Colored pens, markers, or gel pens.
Ribbon for binding if making a booklet.
Small embellishments(buttons, dried flowers, fabric scraps).
This heartfelt project can take anywhere from 4-8 hours spread over several days, but it's time well spent. You're not just making a family tree, you're beautifully preserving your family's legacy.
Conclusion
As you can see, drawing a family tree can be fun and meaningful. With these easy family tree drawing ideas, you can create something you truly enjoy.
A family tree is so much more than just a drawing on paper. It's a bridge connecting generations. It's a way to preserve precious stories before they're forgotten. It's a gift that shows your children and grandchildren where they come from.
Most importantly, a family tree brings people together. It helps you see your roots. You will beable to remember loved ones and share memories across generations. So grab your supplies, take your time, and start creating a family tree you will be proud to share.
If you want more drawing ideas, feel free to get our Free PDF Cheat Sheet of hand-drawing ideas by mood.


FAQs
What is the easiest way to draw a family tree?
Start with a simple tree shape. Place the oldest family members at the top and the younger ones below. Then connect them with clear lines.
Do I need drawing skills to make a family tree?
No, you don’t. Simple shapes, clean lines, and neat writing work perfectly. A basic design can still look beautiful.
Are family tree drawings good for kids?
Yes, they are great for kids. You can use colors, fun shapes, and pictures to make the activity enjoyable and easy to understand.
What tools can I use to draw a family tree?
You can use paper and pencils, markers, or digital tools like Canva or drawing apps. Choose what feels easiest and most comfortable.
How can I make my family tree look more creative?
You can add photos, colors, symbols, or small drawings. For example, use leaves, hearts, or frames to highlight each family member.
Can I create a family tree if I don’t know everyone?
Yes, you can. Start with the family members you know. Later, you can add more names as you learn more about your family.