
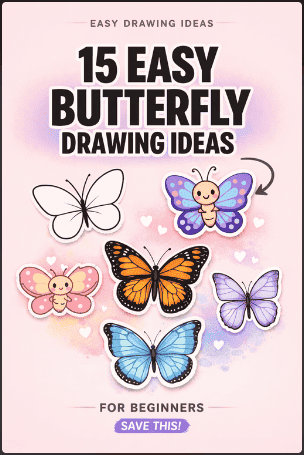
15 Easy Butterfly Drawing Ideas for Beginners
If you’re looking for easy butterfly drawing ideas, you are in the right article. You will find great ideas for inspiration with step-by-step instructions.
Most beginners struggle with drawing because they start with subjects that feel too complex. Butterflies fix that. They give you simple shapes, clear symmetry, and patterns you can repeat without guessing.
In this article, you will find 15 easy butterfly drawing ideas you can sketch right away. Each idea focuses on a simple style, so you build confidence with every drawing instead of getting stuck.
These ideas come from beginner practice methods that work. You start with basic shapes, refine the wings, and add small details step by step. So grab your pencil and let’s start.
Note: Some links in this article are affiliate links.
Tools You Need for Butterfly Drawing
You do not need expensive supplies to draw a butterfly. You can start with a few basic tools and still get high-quality results.
The goal is to keep your setup simple, so you focus on improving your drawing skills.
You need to start with tools that give you control and flexibility. As you improve, you can upgrade or add more options, but the basics are enough to get strong results.
Here are some essential tools to get started:
Pencil: Use an HB pencil for light sketches and easy corrections. You can also use a 2B pencil if you want slightly darker lines.
Eraser: Choose a soft eraser to clean your sketch without damaging the paper. A kneaded eraser gives you better control for small areas.
Paper: Use smooth paper for cleaner lines. Regular printer paper works for practice, but sketch paper gives better results.
Fineliner or black pen: Trace over your final sketch to create clean, sharp outlines. Use a thin tip for more control.
Colored pencils or markers: Add color using colored pencils for soft shading or markers for bold colors.
Keep your setup simple and focus on practice. The more you draw, the more control you build, even with basic tools.
Related blog post: 15 Cat Drawing Ideas for Beginners.
Easy Butterfly Drawing Ideas
For an easy butterfly drawing, you can start with simple shapes, then build details step by step. You need to focus on symmetry first, then refine patterns and lines.
Here are some butterfly drawing ideas for inspiration:
1. Simple Butterfly Drawing
A great starting point for beginners, this idea focuses on building a butterfly using basic shapes. You train your eye to understand balance and structure without distractions.
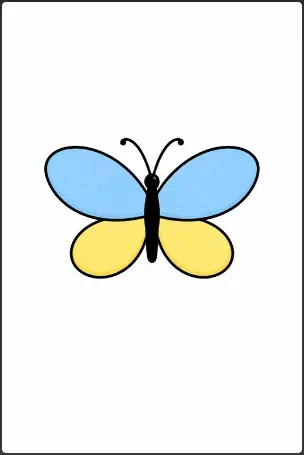
You can start by sketching two large oval shapes for the wings and a straight vertical line for the body. You should keep your strokes light so you can adjust the shape easily.
Focus on making both sides similar before moving forward.
Once the base looks balanced, you can refine the edges and clean your lines. You need to keep the design simple and avoid extra details at this stage. This helps you build control and confidence early.
Key steps to follow:
Draw a vertical center line for symmetry.
Sketch two large oval wings on each side.
Add a thin body in the middle.
Refine the outline with smooth curves.
2. Cartoon Butterfly Drawing
If you want a fun and playful result, this style uses soft shapes and simple features. It works well for quick sketches and beginner practice.

Draw rounded wings with soft curves and a small body in the center. You can exaggerate the shapes to make the butterfly look more playful. Keep your lines smooth and avoid sharp angles.
After that, you should add simple patterns like dots or curved lines inside the wings. You can also draw a face to give it personality. This style works well when you want fast and clean results.
Key steps to follow:
Use round and soft wing shapes.
Keep proportions slightly exaggerated.
Add simple patterns like dots or lines.
Draw a small face for a character.
3. Minimalist Butterfly Line Art
For clean and modern results, focus on drawing with as few lines as possible. This approach improves your line control and precision.

You need to start with a continuous line to form both wings and the body. You need to move slowly and keep your hand steady to maintain clean curves. Avoid sketching too many guidelines.
Then refine the line to make it smooth and even. You should remove extra marks and keep only the essential shape. This improves precision and control.
Key steps to follow:
Use one continuous line.
Focus on smooth curves.
Keep spacing even on both sides.
Remove unnecessary details.
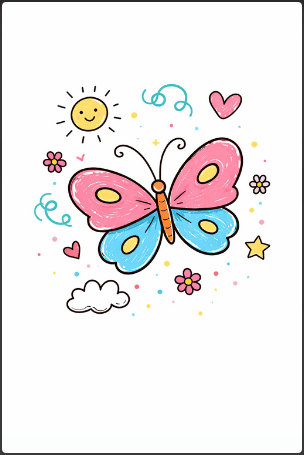
4. Cute Butterfly Drawing
To create a more beautiful and friendly look, focus on soft shapes and expressive features. This style is popular for small designs and stickers.
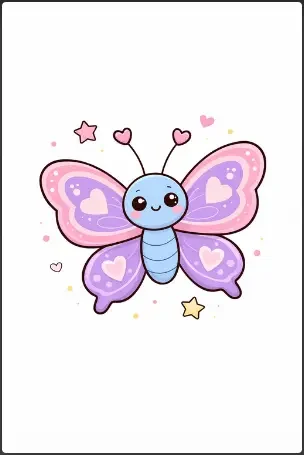
You need to start with rounded wings and a small body. You can add large eyes and a simple smile to make the butterfly look more expressive. Keep proportions slightly exaggerated.
Next, you should include a few simple patterns inside the wings. You need to keep the design clean, so it stays easy to read and visually clear.
Key steps to follow:
Draw rounded wings and a small body.
Add big eyes and a smile.
Use simple patterns inside the wings.
Keep the design clean and balanced.
Related blog post: 15 Easy Flower Drawing Ideas for Beginners.
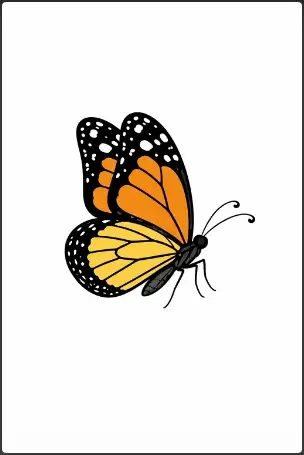
5. Monarch Butterfly Drawing Easy
This option introduces a real butterfly style while keeping the process simple. You focus on structure and recognizable patterns.
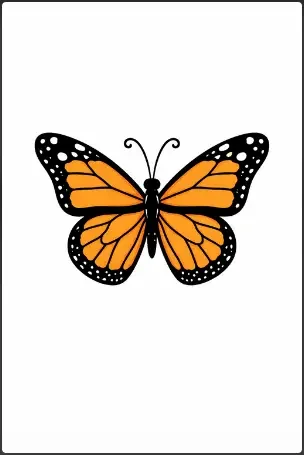
Draw large wings and divide them into sections using simple lines. You should keep the structure clear and avoid adding too many small elements.
Then add bold shapes inside each section to suggest the monarch pattern. You can simplify the design while keeping the overall look recognizable.
Key steps to follow:
Sketch large wings with clear sections.
Use bold shapes for patterns.
Keep symmetry between both sides.
Avoid overcomplicating details.
6. Side View Butterfly Drawing
When you want to practice depth, drawing from the side helps you understand how wings overlap.
Start by drawing one full wing and a thin body at a slight angle. You need to place the second wing partially behind the first to create depth.
After that, you should refine the visible wing and adjust the hidden one. You can keep details simple, so the drawing stays clear and readable.
Key steps to follow:
Draw one wing fully visible.
Add a tilted body line.
Sketch the second wing partially hidden.
Keep details minimal for clarity.
7. Butterfly Doodle Drawing
For relaxed practice, this style lets you draw freely without strict rules. It helps improve flow and creativity.
Use loose and quick lines to sketch the wings and body. You can let your hand move freely without focusing on perfect symmetry.
Then fill the wings with repeated shapes like circles, waves, or small lines. You should keep patterns consistent but not rigid.
Key steps to follow:
Draw with loose and quick strokes.
Do not focus on perfect symmetry.
Fill wings with simple repeated patterns.
Keep the flow natural.
8. Small Butterfly Sketch
If you want quick practice, drawing small butterflies helps you improve control and precision.
Draw a compact butterfly with simple shapes and a thin body. You need to keep everything small and controlled.
Next, you should refine the outline and avoid adding too many details. This keeps the drawing clean and effective.
Key steps to follow:
Keep the drawing small and simple.
Use clean and controlled lines.
Avoid excessive details.
Focus on a clear shape.


9. Symmetrical Butterfly Drawing
To improve accuracy, this method trains you to match the butterfly's wings evenly.
Draw a vertical guideline for the body, then sketch one wing on one side. You should take your time to get the shape right.
After that, you need to copy the same shape on the other side. You can use light guidelines to match both sides accurately.
Key steps to follow:
Draw a center guideline.
Sketch one wing carefully.
Mirror the same shape on the other side.
Adjust both sides for balance.
10. Butterfly Outline Drawing
When you want to strengthen your line work, focusing only on the outline is a strong exercise.

You can start by drawing the outer shape of the butterfly with smooth curves. You should avoid adding inner details at this stage.
Then clean up the outline and remove extra marks. You need to keep the drawing simple and clear.
Key steps to follow:
Draw only the outer shape.
Use smooth and continuous lines.
Remove rough sketch marks.
Keep the outline clean.
11. Heart Wing Butterfly Drawing
For a creative variation, this style shapes the wings into hearts. It works well for decorative designs.
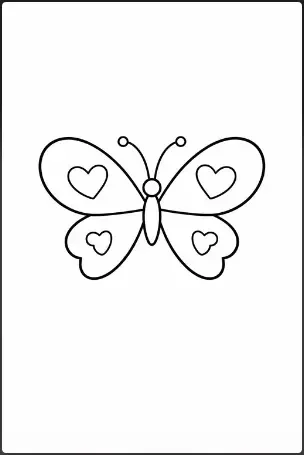
Draw the top wings in a heart shape and keep the bottom wings simple. You can use soft curves to make the design look balanced.
Next, you should refine the edges and adjust symmetry. You need to keep the heart shape clear and recognizable.
Key steps to follow:
Shape the top wings like hearts.
Keep the bottom wings simple.
Use soft curves.
Maintain symmetry.
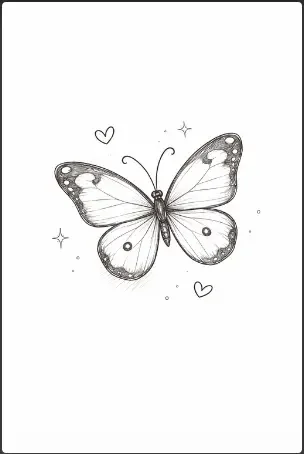
12. Butterfly Pencil Shading
If you want to add depth, this method focuses on light shading techniques.
Start with a basic outline of the butterfly. You should lightly shade near the edges of the wings to create depth.
Then blend the shading gently to smooth transitions. You need to avoid over-shading so the drawing stays clean.
Key steps to follow:
Draw a clean outline first.
Add light shading near edges.
Blend gently for a smooth effect.
Keep shading subtle.
13. Butterfly with Flowers Drawing
To improve composition, combine a butterfly with simple floral elements.
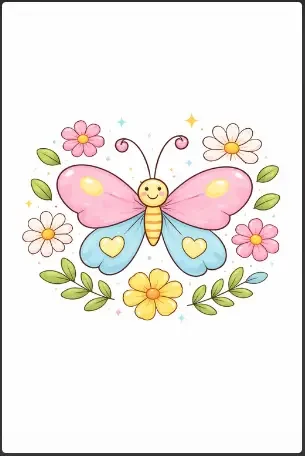
Draw a simple butterfly, then add small flowers around or inside the wings. You should keep both elements simple.
After that, you can refine spacing and balance the composition. You need to make sure the butterfly remains the main focus.
Key steps to follow:
Draw a simple butterfly first.
Add small flowers around it.
Keep spacing balanced.
Avoid overcrowding.
14. Geometric Butterfly Drawing
For a structured approach, use straight lines and shapes to build the wings.
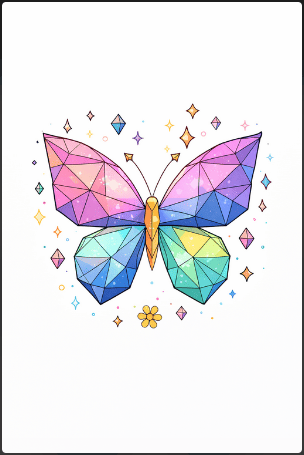
Break the wings into simple shapes, such as triangles and straight lines. You should plan the structure before refining.
Then refine each shape and keep both sides consistent. You need to maintain clean edges for a structured look.
Key steps to follow:
Divide wings into geometric shapes.
Use straight lines and angles.
Keep symmetry on both sides.
Maintain clean edges.
15. Step-by-Step Butterfly Drawing
When you want a repeatable process, follow clear stages from sketch to final lines.
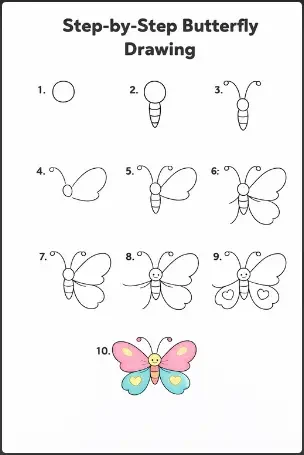
You need to start with a vertical line for the body and basic wing shapes on both sides. You should also keep your sketch light and flexible.
After that, refine the wings, clean the lines, and add simple patterns. You need to move step by step from rough shapes to final details.
Key steps to follow:
Draw the body guideline first.
Add basic wing shapes.
Refine and clean lines.
Add simple patterns at the end.
Tips to Improve Butterfly Drawings
Improving your butterfly drawings comes down to practicing the right fundamentals. You should focus on symmetry, clean lines, and simple shapes before adding details.
Small adjustments in your process will quickly improve your results.
Use these practical tips to get better with each drawing:
Practice symmetry first: Draw a light center line before sketching the wings. This helps you keep both sides balanced and avoids uneven shapes.
Start with light sketches: Use soft strokes at the beginning. You need to refine the shape before committing to darker lines.
Use simple references: Look at easy butterfly images to guide your shapes and patterns. This helps you avoid guessing and improves accuracy.
Break the drawing into steps: Start with the body, then add wings, then refine details. You should not try to draw everything at once.
Keep patterns simple: Focus on a few clean shapes inside the wings instead of adding too many details. This keeps your drawing clear.
Clean your lines: After sketching, go over your final lines slowly. You need to make them smooth and consistent.
Practice regularly: Draw a few butterflies every day using different styles. Repetition helps you improve faster.
The more you focus on these basics, the more control and confidence you will build.
Conclusion
Drawing butterflies becomes easier when you focus on simple shapes, clean lines, and consistent practice. You do not need advanced skills or tools to get good results. Start with the basic ideas in this guide, repeat them, and improve one step at a time.
Pick a few styles, practice them daily, and refine your symmetry and details. The more you draw, the more confident and accurate your work will become.
More blog posts:


FAQs About Butterfly Drawing
How to draw a butterfly step by step?
Start by drawing a vertical line for the body. Then sketch two wing shapes on each side. You should keep your lines light at first so you can adjust them.
After that, refine the wings, clean the outline, and add simple patterns. Finish by tracing your final lines and adding color if needed.
What is the easiest butterfly to draw?
The easiest butterfly to draw uses simple oval or rounded wing shapes with minimal details. You should focus on symmetry and clean outlines instead of complex patterns.
A basic outline with a few dots or shapes inside the wings is enough for beginners.
How to draw symmetrical wings?
Draw a center guideline first, then sketch one wing. You need to copy the same shape on the other side by using the guideline as a reference.
You can also fold paper or measure distances to improve accuracy. Keep your strokes light so you can adjust both sides easily.
What is the best pencil for drawing?
An HB pencil works best for beginners because it creates light, clean lines that are easy to erase. You can also use a 2B pencil if you want slightly darker lines.
Start light, then darken your final lines once the sketch looks correct.
How long does it take to learn drawing?
You can learn basic butterfly drawing in a few days with regular practice. If you practice daily, you will see clear improvement within one to two weeks.
Focus on simple shapes and repeat the process to build your skills faster.